The number of virtual servers that we have deployed in the Lab for evaluations and trial software continues to grow. We decided that this might be a good time to deploy Windows Server Update Services (WSUS) and see if we could leverage the functionality that the product provides. Too often we start to work on a project and find we’re interrupted by the patches from the most recent “Patch Tuesday.”
My last encounter with WSUS was with version 2.0 on a Windows Server 2003 R2. We had about 15 servers and 75 Windows Vista and XP workstations all running Office 2003. This year finds us with Windows Server 2008 R2 servers, and a collection of Windows 7 and Vista Professional computers along with our intrepid XP legacy workstation.
A little background
WSUS is responsible for checking in with Microsoft to identify patches that need to be deployed, downloading them to the WSUS server (or not) and once approved, deploying them to client computers. WSUS uses the Microsoft Internal Database (SQL Server Embedded Edition) found on Windows Server 2008 to track computers and activity. This database provides an alternative to purchasing SQL Server. Group Policy is used to configure domain computers to use the WSUS server. More on that topic after we get WSUS installed. The client software is the much-loved wuauclt.exe program which coordinates activities with the server.
The Windows Server Update Services page & links to resources is located at http://technet.microsoft.com/en-us/windowsserver/bb332157.
Probably, the most used features found in the WSUS Management Console is update approval and identifying why updates fail. Microsoft has provided a link to various WSUS Diagnostic Tools and Utilities. They are available for download at http://technet.microsoft.com/en-us/wsus/bb466192. But really, who would need any tools much less diagnostics? This is a Microsoft product – it works!
SCE – a WSUS alternative
For the small and medium size business (SMB), Microsoft offers System Center Essentials (SCE), http://technet.microsoft.com/en-us/systemcenter/essentials/default.aspx. SCE is based on the architecture of WSUS 3.0 & System Center Operations Manager 2007 (SCOM). SCE offers unified product patching and deployment, proactive identification of problems through resource monitoring as well as initiating recovery operations. Essentials also support for 3rd party software packages (.msi and .exe) deployments, and support for Hyper-V virtual machines.
According to Microsoft, the typical SMB is characterized as having under 25 servers , between 50-500 computers and little or no IT staff. These same management issues found in the SMB space scales up to the enterprise.
WSUS System requirements
Supported Operating Systems: Windows 7, Windows Server 2003, Windows Server 2003 Service Pack 1, Windows Server 2003 Service Pack 2, Windows Server 2008, Windows Vista, Windows Vista Service Pack 1, Windows Vista Service Pack 2, Windows XP Service Pack 3, Windows Server 2008 R2, Windows Server 2008 SP1 or later versions, Windows Server 2003 SP2 or later versions, Windows Small Business Server 2008, Windows Small Business Server 2003 and Windows XP SP3
WSUS 3.0 SP2 Server Software Prerequisites:
- Internet Information Services (IIS) 6.0 or later versions
- The Microsoft .NET Framework 2.0 or later versions
- Server component cannot be installed on Windows client OS
- You must have one of the following supported databases installed:
-
Microsoft SQL Server 2008 Express, Standard, or Enterprise Edition SQL Server 2005 SP2
-
Windows Internal Database
-
If one of the supported versions of SQL Server is not installed, the WSUS 3.0 SP2 Setup Wizard will install Windows Internal Database.
-
- Microsoft Management Console 3.0
- Microsoft Report Viewer Redistributable 2008
- Windows Server 2008 R2 requires WSUS 3.0 SP2. If you use Windows Server 2008 R2, then you should install WSUS 3.0 SP2. Do not install WSUS 3.0 SP1 on Windows Server 2008 R2.
- WSUS 3.0 SP2 is not supported for use with Terminal Services on the front-end server in a remote SQL configuration.
WSUS 3.0 SP2 Administration Console Software Prerequisites:
- Administration Console-only installation can be installed on supported operating systems.
- Microsoft .NET Framework 2.0 or later versions.
- Microsoft Management Console 3.0 or later versions.
- Microsoft Report Viewer Redistributable 2008.
The remainder of this post will cover the detailed WSUS Installation steps, WSUS Configuration, Creating a Group Policy to direct workstations to connect with WSUS and finally show the results of deploying two .NET Framework patches to our workstations.
WSUS Installation
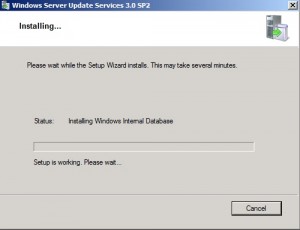
Installing WSUS 3.0 SP2 on Windows 2008 R2 SP1 generates a compatibility error. I’m thinking WSUS is not destined for Windows Server 2008 R2. Turning to my favorite source of information, I only need to spin through 15 minutes of browsing to find out that WSUS is a Role in Windows Server 2008 R2. Who would have thought. Actually, the Role Installation Wizard performs some prep work and then the WSUS Installer takes over the actual product installation and setup.
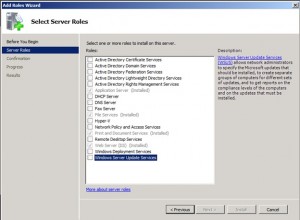
Click the box to select the WSUS role.
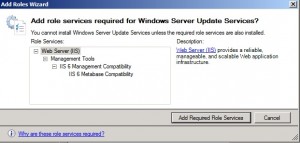
Click the Add Required Role Services button and then click Next.
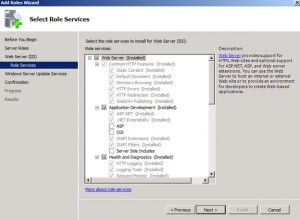
You get the opportunity to specify additional prerequisite components as shown below.
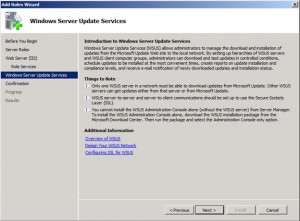
Click Next and you get the overview shown below.
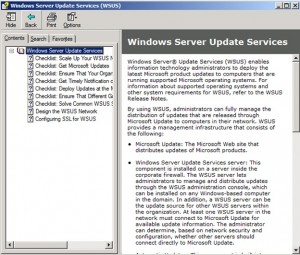
Click on the Additional Information links and a Help window appears as shown below. This is a great feature because it doesn’t interfere with the installation while offering an opportunity to do some last minute research. Since it’s a separate window, it’s available during the installation and setup process.
In the Confirmation window below, click Install.
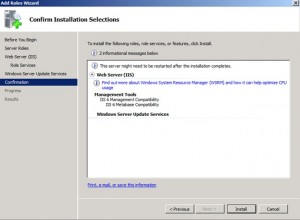
Waiting, waiting for something to happen only to find the bashful window shown below hiding behind the Add Roles Wizard.
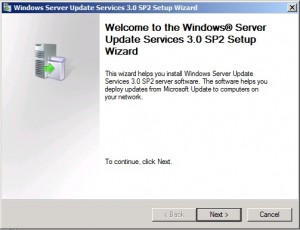
Click Next, then accept the standard license agreement, then Next.
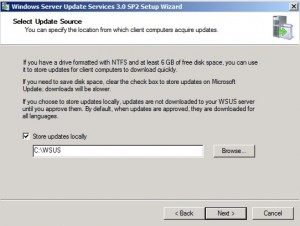
Click Next if you want to store the updates locally. Otherwise, the clients will pull the updates from Microsoft. Good if you want to save space on the server – bad because it will use up bandwidth with each client pulling updates down from Microsoft.
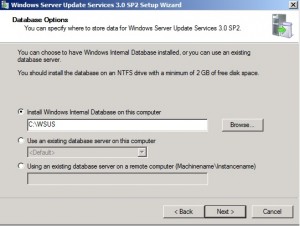
Make your choice and click Next.
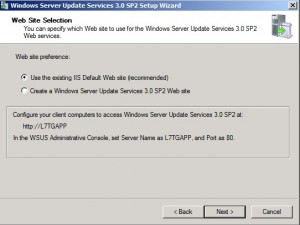
There are no other web sites on the server, so we’re taking the happy path. Click Next.
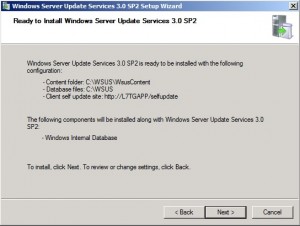
Review your selections and click Next to continue.
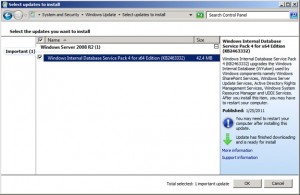
During installation, the standard Windows Update popup appears letting you know that once the Internal Database has been activated, it too, needs to be updated. You can set this window aside and come back to it after the installation is finished.
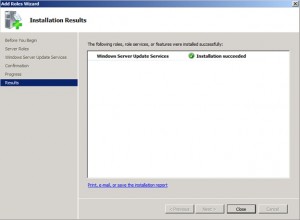
This completes installation,
Click Finish.
Configuration Wizard
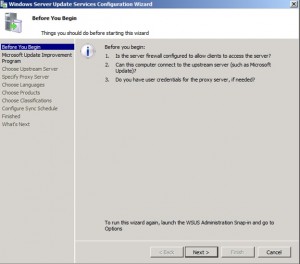
This starts the WSUS Configuration Wizard as shown below.
This allows you to configure a server to receive updates from another WSUS server, in effect you can create a network of servers. This comes in handy working in geographically distributed networks. Click
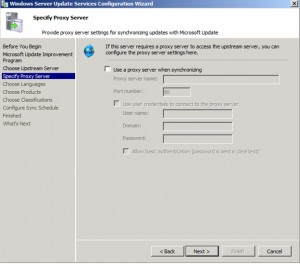
Specify a Proxy if required, then click Next.
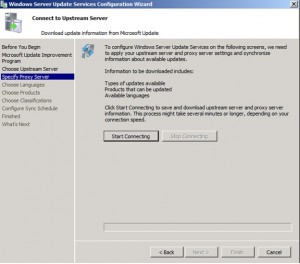
Click Start Connecting. Click Next.
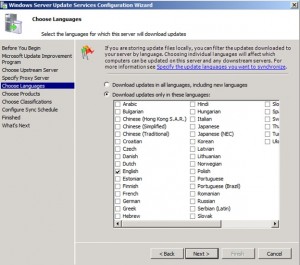
Choose Language(s), then click Next.
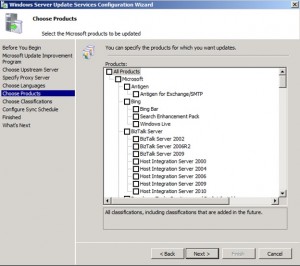
Select the products you want to manage. During the synchronization, WSUS will get an update on every patch released for the product from day 1. Click Next after making your selection.
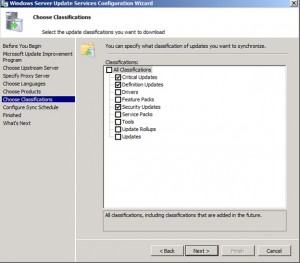
Choose Classifications from simple patches to entire service packs. Click Next.
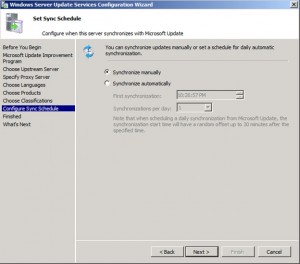
Choose the Synchronization Schedule, then click Next.
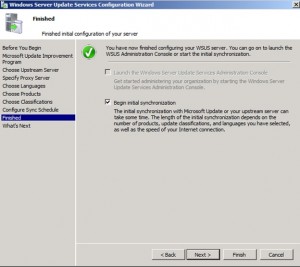
You can skip this and use the Management Console to begin your synchronization. Actually, this is a good move because you can observer the process if you choose to sync individual products rather than all of them at once.
Close the window to complete the installation.
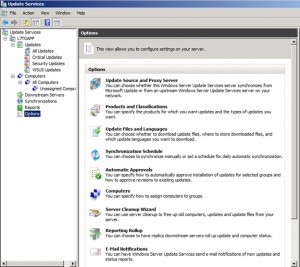
Scroll down to the Options section to fine-tune your selections. A number of the options were covered in the Configuration wizard. The console exposes all of the options for you.
Group Policy
The next step in the process is to use Group Policy to configure the target workstations Create a group policy to deploy updates to windows 7, XP and vista workstations.
Technet reference article on group policy: http://technet.microsoft.com/en-us/library/cc708574(WS.10).aspx.
Note that you do not Add Templates in a Windows Server 2008 domain. The templates are in the Group Policy Editor that you invoke using Group Policy Management Console.
On the DC, Start Group Policy Management under Administrative tools. Note in Server 2008, Group Policy Management is a role that’s part of Active Directory Services.
When you configure the Group Policy settings for WSUS, you should use a Group Policy object (GPO) linked to an Active Directory container appropriate for your environment. You probably want granular control over the workstations receiving WSUS updates, and as a result, it’s recommend that you do not edit the Default Domain or Default Domain Controller GPOs to add WSUS settings.
In a simple environment, you link the GPO with the WSUS settings to the domain. In more complex environments, you might have multiple GPOs linked to several organizational units (OUs), so that you can set different WSUS policy settings on different types of computer. We’re creating an Organizational Unit called Eastside to contain Windows 7 and an OU called Westside to contain the Windows XP workstations.
After you set up a client computer, it will take a few minutes before it appears on the Computers page in the WSUS console. For client computers configured with an Active Directory-based GPO, it will take about 20 minutes after Group Policy refreshes. By default, Group Policy refreshes in the background every 90 minutes, with a random offset of 0–30 minutes.
We begin with a new Group Policy Object which we will then link to the Organizational Units we created. We’re also going to take advantage of Client-side Targeting to get the computers into the appropriate WSUS Computer Groups.
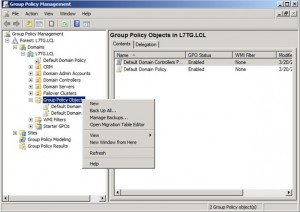
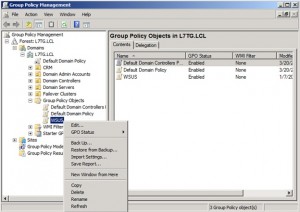
Go to Group Policy Objects ->New as shown below.
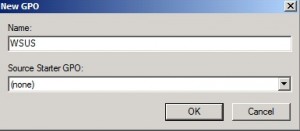
Type in a name for the GPO.
Edit the group policy object as shown below.
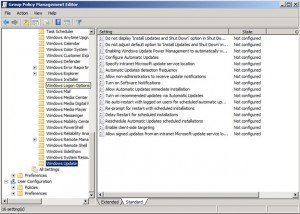
In the Group Policy Management Editor, navigate to Computer Configuration -> Policies -> Administrative Templates: Policy -> Windows Components -> Windows Update. This brings up the settings window as shown below.
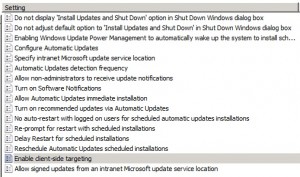
There are a number of updates that can be configured as shown in the list.
We’re going to concentrate on just a few:
- Configure Automatic Updates,
- Specify intranet Microsoft update service location,
- Automatic Updates detection frequency,
- Allow Automatic Updates immediate installation and
- Enable Client-side Targeting
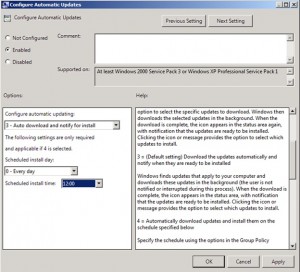
Setting: Configure Automatic Updates
We’re setting the update to occur during the lunch hour.
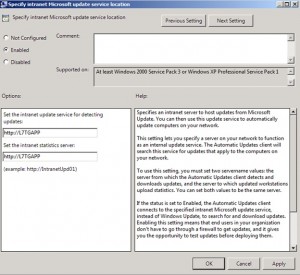
Specify intranet Microsoft update service location
Enter the WSUS server HTTP(S) URL twice, so that the server specified for updates is also used for reporting client events. Type the HTTP(S) URL of the same WSUS server. In our environment, it will be http://L7TGAPP. If the port is not 80 for HTTP or 443 for HTTPS, you should add the port number: //servername:portnumber.
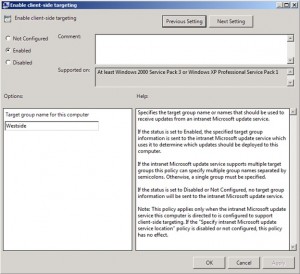
Enable Client-side Targeting.
This policy enables client computers to add themselves to target computer groups on the WSUS server. When enabled, this computer will identify itself as a member of a particular computer group when it sends information to the WSUS server. You use WSUS Computer Groups to determine which updates should be deployed to this computer. Of course, you must actually create the group on the WSUS server.
In Update Services, navigate to All Computers and right-click Add Computer Group and enter a name in the window as shown below.
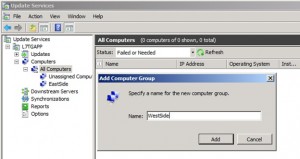 You will use the name in the Target Group Name for this computer as shown below.
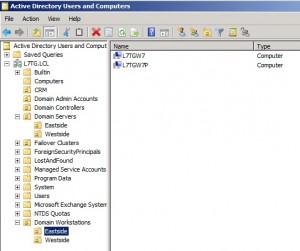
Create separate OUs for the workstations. Open Active Directory Users and Computers. We created an OU for Domain Workstations and sub Ous for the Eastside and Westside groups for Windows 7 and XP computers, respectively.
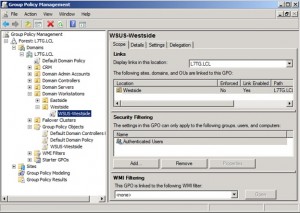
Next, link the GPO to the OU as shown below by dragging the WSUS-Westside GPO and dropping it on the Westside OU as shown below.
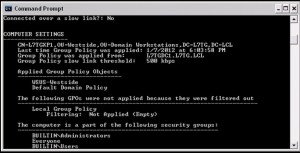
Wait for the policy refresh in 15 minutes or so, or run gpupdate /force. Run gpresult for XP or gpresult /r on Windows XP. The results are shown below.
Rollout
After a while, the computers show up in their respective WSUS Computer Groups. If you don’t use client-side targeting, the computers will register under All Computers.

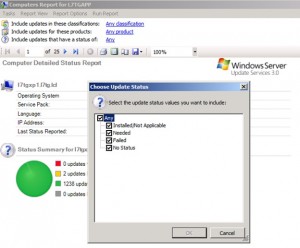
Generate a report for a specific computer. You can use the report to determine which updates should be installed. The report allows you to fine tune it. In the example below, we clicked on Status link shown below and selected the Needed setting.
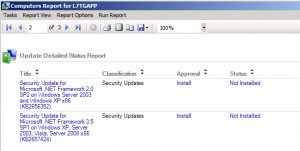
Review the updates needed for the workstation.
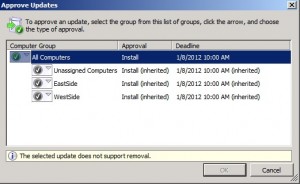
Click on the Approval heading to approve updates as shown below. Clicking the link again allows you to set a deadline for the completion of the installation.
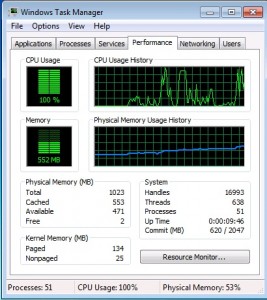
After a while, the client computers begin the installation. You can see the activity in Task Manager as shown below.
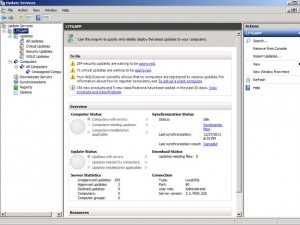
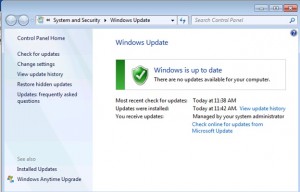
After a restart for this patch, the computers report 100% compliance in the WSUS console as shown below.
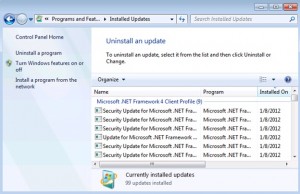
Checking Installed Updates reveals the successful installation of the .Net Framework patches.
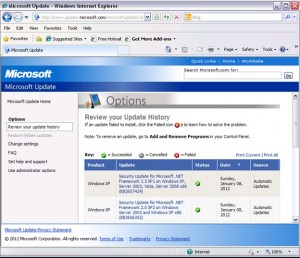
In Windows XP, click on the Microsoft Update link to view the update history. As shown below, the updates were successful on our XP workstation.
That’s it. We have a completed a Windows Server Update Services deployment in the Level 7 domain completing the installation and product configuration. We synchronized Windows 7 and Windows XP updates. We next created two organizational units for our workstations along with the Group Policy Objects. The GPOs will be used by the workstations to report in to the WSUS server and synchronize updates. The workstations use the wuauclt.exe program to interact with the server. Finally, we approved the updates and observed their installation.
This posting is provided “as is” with no warranties, guaranties or any rights whatsoever. All content is based on the author’s experiences and opinions and is not intended to influence the actions of the reader.


EWGFTEHFGJNM,NM