I project that I’ve been working on recently offered an opportunity to work with VMware virtualization technology. The client has an EXSi installation with a number of hosts and a server running vSphere. The opportunity to work on a project involving VMware proved interesting because I had worked with it prior to switching all of my current work to the Microsoft Hyper-V platform. Level 7 Tech Group is all about product evaluations and the easiest way to perform evaluations is in a virtual environment. The lab runs on a Windows Server 2008 R2 Hyper-V infrastructure. As a result of the assignment, the lab may soon be working in a heterogeneous virtualization environment consisting of VMware and Microsoft Hyper-V technology.
This specific project all about Physical to Virtual (P2V) conversions. It takes place in the Level 7 lab environment. My previous experience with P2V was in the era of the Microsoft Virtual Server 2005 R2 product (MVS) – the precursor to today’s Hyper-V. The P2V procedure in MVS was rather cutting edge at the time. Notice that I described it as a “procedure” because it was a recipe that you followed that would guarantee downtime and possibly a physical server that would be damaged in the process. Needless to say, I didn’t use it as I did not want the liability of potentially destroying a production server.
Along comes Hyper-V and Microsoft’s System Center Virtual Machine Manager 2008 R2 (SCVMM) product offering. SCVMM was developed to compete with VMware and their management technology in their ESXi infrastructure. SCVMM has the ability to perform P2V conversions that work. To get a better understanding of SCVMM, I recommend the book Mastering Virtual Machine Manager 2008 R2 by Michael Michael and Hector Linares, published by Wiley Publishing, Inc., 2010. You can find it here at Amazon.
Level 7 Tech Group does not have the resources to deploy SCVMM in the lab so I haven’t had a chance to work directly on a Microsoft P2V project. However, we do have the resources to perform a P2V using VMware tools.
The challenge at hand is to convert a Windows Server 2003 R2 /SP2 Enterprise computer running IIS and a MailEnable post office to a virtualized application. VMware provide freely available tools to support this project: VMware vCenter Standalone Converter and the VMware Player . You can also download VMware Workstation 8 for a 30 day trial and you can buy it for only $199 at the VMware Store located here : http://www.vmware.com/vmwarestore/. While you ‘re there check out the extensive virtualization product offerings. You have to wade through the marketing hype to find the products.
So, we have our tools, VMware vCenter Standalone Converter, VMware Player and a physical server named “Opus.”
WMware Standalone Converter
The first step was to download the tools and install them. I used a HP EliteBook 8440p laptop with 2.4 GHZ Intel I5 processor and 4GB memory. After that, run the virtual machine using the VMware Player. Perhaps as a follow up project, incorporate the VMware virtual machine into the Hyper-V environment.
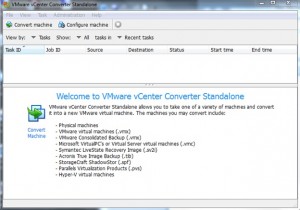
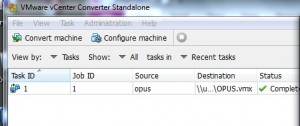
Launch the Converter. The management console is shown below.
Two tasks are available: Convert Machine and Configure Machine.
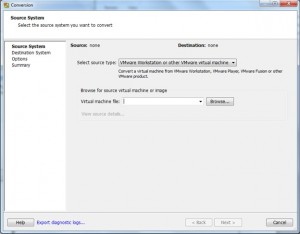
Click on Convert Machine to launch the wizard as shown below.
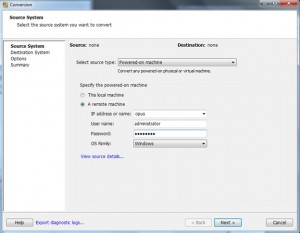
Using the drop down, choose the Source type: Powered-on machine, VMware Infrastructure virtual machine (did we say V3V as well), VMware Workstation or other VMware virtual machine, Backup image or third-party virtual machine and Hyper-V server. I’ll be using Powered-on machine.
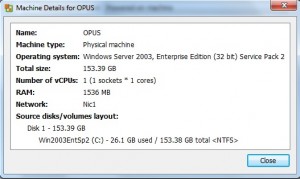
Before clicking Next, click on the View source disk… link. This will use the credentials and connection information to connect to the target and give you a snapshot of the physical characteristics of the server. This will be valuable in a subsequent step where you describe the hardware in the virtual machine. Note, you will get a Certificate warning, so just click through it.
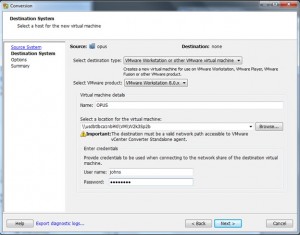
Close this window and click Next in the previous window to move to the Destination System step, shown below.
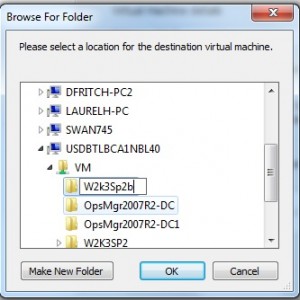
Provide a name for the virtual machine (Opus) and select a location for the VM. Note that the location must be a network share. You can browse to a location and create a folder as shown below.
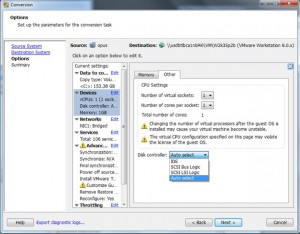
Click OK to close this window and Next in the previous one to advance to the Options menu shown below.
I ran into a problem with my first attempt. It seems as though following the happy path resulted in the converted virtual machine “blue screening” when I started it in the VMware Player. The Opus physical server is using an IDE drive. Googling for 15 minutes or so led me to believe that the conversion only works if you specify that the target platform uses SCSI. You can try to change the configuration file or just redo the conversion. This time I specified the SCSI LSI Logic choice. It’s recommended when the source is Windows 2003. Otherwise choose SCSI Bus Logic.
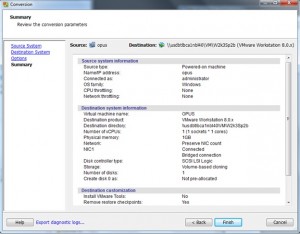
Click Next to continue to get the Summary page shown below.
Click Finish to start the conversion.
The trip takes about an hour and 15 minutes.
The next step is to click the Configure Machine button.
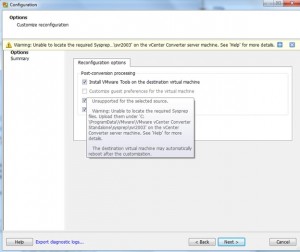
Check the box to Install the virtual tools.
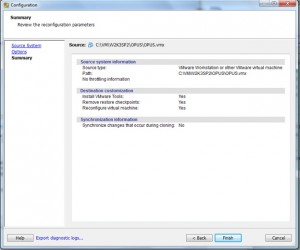
Review the Summary and click Finish.
There you have it.
VMware Player
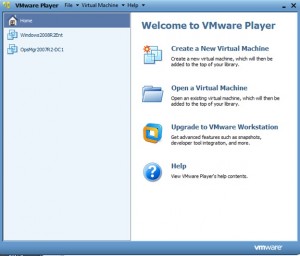
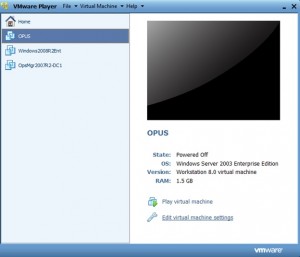
The next step is to see if it works. Launch the WMware Player. The control panel is shown below.
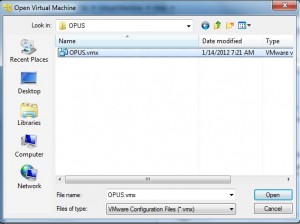
Since we have a VMware virtual machine, we want to select the Open Virtual Machine task. You will be asked to locate the vm configuration file (vmx) that is associated with the virtual hard disk (vhdx) file as shown below.
This will add the Opus vm to the control panel.
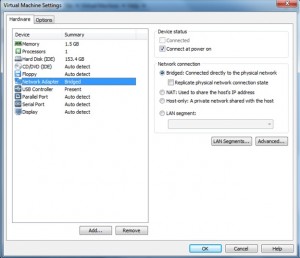
Next, select the VM and click the Edit virtual machine settings link which opens the settings window shown below.
Notice thatthere are general settings to change the status of a hardware component: “Connected” and “Connect at power on.” The first setting allows you to add devices when the machine is running. Choosing both will make the device available when it boots as well as enabling it. One thing to keep in mind is that this image is not “sysprepped”, so that means if it comes on line with the Network Adapter in a bridged stat, it will be visible on the network either with the same IP settings if the “Replicate physical network connection state” box is checked or it will just show up as a DHCP-enabled device. Either way it will be connected with the same computer name and cause an error in the network with a duplicate NETBIOS computer name and possibly a duplicate IP Address. I strongly suggest bringing up the virtual machine for the first time with the Network Adapter disconnected until you decide how to handle the situation. Click OK to close the window.
When you are ready, perform your “cross your fingers” ritual and click on the Play Virtual machine link in the control panel.
That’s it! The physical computer has been converted to a virtual machine using the VMware Standalone Converter. In another post, I migrate the VMware image into a Hyper-V environment.
This posting is provided “as is” with no warranties, guaranties or any rights whatsoever. All content is based on the author’s experiences and opinions and is not intended to influence the actions of the reader.




Please note that VMware Player will not install on a system on which Microsoft Hyper-V has already been installed. Target system Win8 Enterprise x64 ( on an AMD Phenom II X6 1045T, 16GB) using: VMware-player-5.0.2-1031769