This post in the Microsoft Dynamics CRM 2011 Evaluation series is a follow-up to the earlier post that covered the prerequisites to and the installation of Microsoft Dynamics CRM 2011 Server. In this L7TG lab exercise, we’ll concentrate on the Outlook CRM 2011 Client installation and initiate some basic connectivity with the L7TG CRM Organization using Outlook and the browser interface.
As in CRM 4.0, there are two methods used to connect to CRM: the browser and the Outlook client in either on-line and off-line mode. You can get more information on that functionality in the Dynamics CRM 4.0 lab post.
Remember that most of the communication that exists within CRM is based on the exchange of email correspondence between the Organization’s CRM Representative and the Account’s Contact. The Outlook client adds the CRM functionality to Outlook. This functionality brings with it the basic CRM objects like accounts and contacts within their functional context of Sales, Marketing, Service, etc..
The client is installed as an Outlook Add-In. An option allows you to include off-line capability. This comes in handy, if you use a laptop because it allows you to work while disconnected from the network. When you re-connect, your work automatically synchronizes.
Performing a little research before launching in to a new activity is always a good idea. We found a good video on “How To install the CRM 2011 Client”, produced by the Microsoft CRM team. You’ll find that the democrmonline.com web site offers links to many resources including:
- http://Crm.dynamics.com/en-us/support-overview
- http://Blogs.msdn.com/b/crm
- http://Blogs.msdn.com/b/crm/dynamicsonline
Where do you find the Microsoft Dynamics CRM 2011 Outlook Client? It is supposed to be available for download from your Organization’s CRM web site. The L7TG CRM installation used default values for the web site. Looking at IIS Manager it appears as Microsoft Dynamics CRM in C:\program Files\Microsoft Dynamics CRM\CRMWeb. No luck.
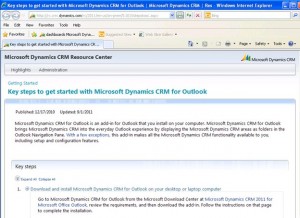
We launched the site in a browser, logged in and poked around in the Resources section. We found that area to be a wealth of information. Actually, the entire interface offers “How to” articles, Help topics and videos at almost every high-level window. Fortunately, you can minimize these once you get familiar with the interface and can reclaim some screen real estate. We clicked on Resource Center, then Get Started with CRM, then 1. Configure (Get started using Outlook). This led us to the on-line link shown below.
We also found it at Microsoft and were able to download it. Click on CRM2011-Client-ENU-i386.exe to extract to a folder on your computer. You must be a member of the local administrators group in order to install this. Once installed, it is available for other users. The extract phase asks for a location to place the files. Make sure you have created an empty one to contain the application components. Next, the setup program launches. It installs prerequisites such as Windows Identity Foundation, SQL Server Compact edition, Live id sign-in Assistant, Online services Sign-in Assistant.
When complete, the Microsoft Dynamics CRM 2011 for Outlook Configuration Wizard launches automatically to set up the connection and synchronization between Outlook and CRM through Exchange. If you have installed it as an administrator, terminate the installation at this point and logon as the appropriate user with a mailbox set up in Outlook. You could probably have the intended user use the “runas” command but we didn’t have time to pursue this.
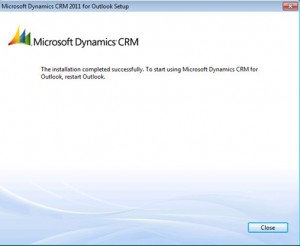
This concludes the successful installation of the client component. Pretty straignt forward.
This posting is provided “as is” with no warranties, guaranties or any rights whatsoever. All content is based on the author’s experiences and opinions and is not intended to influence the actions of the reader.


