Level 7 Tech Group has taken up the challenge of evaluating an on-premise deployment of Microsoft Dynamics CRM 2011. The evaluation will consist of three parts: Server and client installation and a Functional evaluation of the product and user interface. This project is a follow up to the previous evaluation project of Microsoft Dynamics CRM 4.0 within the Level 7 Tech Group Lab and is a follow up to the Lab’s domain preparation.
Infrastructure:
Dynamics CRM 2011 (CRM 2011) will be installed in a virtual lab consisting of an Active Directory Domain (L7TG.LCL) and L7TG.COM, the Internet-facing domain. We’re using three servers:
- L7TGDC1 – Windows Server 2008 Enterprise R2/SP1, 1CPU, 1024MB RAM, DNS;
- L7TGEX – Windows Server 2003 Standard /SP2, 1 CPU, 500MB RAM, Exchange Server 2003 Standard;
- L7TGAPPCRM11 – Windows Server 2008 Enterprise R2/SP1, 1 CPU, 1024MB RAM, AppServer (IIS), SQL Server 2008 R2/SP1.
For client connectivity, we have a Windows XP/SP3 client with Office 2007 and a Windows 7 Professional / SP1 client with Office 2010 Professional.
All computers are part of the Active Directory domain.
Software:
We visited the Microsoft Dynamics CRM Online Blog at mscrm.wordpress.com as part of our product research. Performing almost any type of search leads you to the Microsoft Dynamics CRM On Line web site, http://crm.dynamics.com/en-us/home where you can get plenty of product information. You can also sign up for a 30-day free trial. This is pretty cool and we’ll try that out sometime in the future; however, we were interested in deploying an on-premise version. Trying to find a download site was proving to be futile until we discovered the CRM Online Blog on WordPress. This is a very informative web site. It’s the creation of a a San Francisco-based, “Microsoft CRM MVP since 2006”. Unfortunately, we don’t know his name as it’s not listed on the Blog.
We were able to locate the CRM download site while reviewing the February 23, 2011, post: Microsoft Dynamics CRM 2011 Downloads and Trial Product Keys. The post contains the download links and the 90-day trial product keys.
We were able to download the following Microsoft Dynamics CRM 2011 documentation, which we used as our guide during the installation process:
- Microsoft Dynamics CRM 2011 Client Installing Guide.docx
- Microsoft Dynamics CRM 2011 Implementation Guide.chm (help file)
- Microsoft Dynamics CRM 2011 Installing Guide.doc
- Microsoft Dynamics CRM 2011 Operating and Maintaining Guide.doc
- Microsoft Dynamics CRM 2011 Planning Guide.doc
- Microsoft_Dynamics_CRM_2011_Administrator’s_Guide.doc
Armed with the recipe book and the software we began the installation.
CRM 2011 Installation Overview:
The setup program creates folders to contain: the CRM program files, the .rdl files for the default CRM reports, the Language Packs, Log Files used when tracing is enabled, the CRM Web site, web services and CRM Web reports. The setup program automatically creates the Web site, so IIS and the .Net Framework are prerequisites that are enabled by setup if not already enabled on the target server.
The following AD groups are created: PrivReportingGroup, PrivUserGroup, SQLAccessGroup, ReportingGroup .
The following services are installed: Microsoft Dynamics CRM Asynchronous Processing Service, Microsoft Dynamics CRM Asynchronous Processing Service (maintenance), Microsoft Dynamics CRM Unzip Service, Microsoft Dynamics CRM Sandbox Processing Service.
Setup creates the SQL Configuration and Organization databases as well as SQL Agent jobs used for maintenance and SQL Server Logins for the AD groups that are created.
We installed SQL Server 2008 R2/SP1 on the default instance, MSSQLSERVER with the following components: Agent, Database Engine, SQL Server Integration Services (SSIS), SQL Server Analysis Services (SSAS) and SQL Server Reporting Services (SSRS). As a best practice, we created AD User accounts for the SQL Service components: L7TG\_SQL-Agent, L7TG\_SQL-Engine, L7TG\_SQL-SSAS, L7TG\_SQL-SSIS and L7TG\_SQL-SSRS.
Setup installs the following services. We created AD User accounts for them as well.
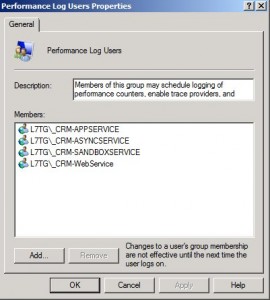
- Application Service – L7TG\_CRM-AppService
- Deployment Web Service – L7TG\_CRM-WebService
- Sandbox Processing Service – L7TG\_CRM-SandboxService
- Asynchronous Processing Service – L7TG\_CRM-AsyncService
Insure that you add the accounts to the CRM Server’s Local Performance Log Users security group.
The L7TG\CRMUser and L7TG\CRMAdmin AD User accounts are created as the first two users in the L7TG organization. We shall later find out that the Domain Admin account (SQLAdmin) that we logged on as to L7RGAPPCRM11 where we ran Setup became the first user account in the CRM organization. This caused quite a bit of head-scratching when it became time to log in to CRM and seriously add users.
We also have a number of user accounts in the domain from the Microsoft Dynamics CRM 4.0 evaluation we performed earlier in the year. We’ll integrate these in to the new organization when we focus on the CRM Client.
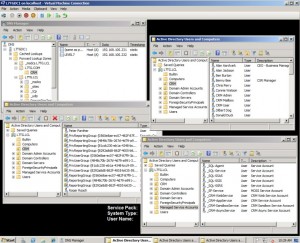
The following screen shot shows the Active Directory views of CRM groups, users and service accounts along with the DNS entry for the CRM Server in an outward facing domain created for this evaluation.
Detailed Installation Steps:
We’re going to go through the steps briefly. The aforementioned Installing Guide provides a solid step-by-step instruction written in Microsoft Tech Doc Speak.
1. Logon to the server with an account that is a member of the Local Administrators group. Remember, this account will be the first user in the CRM organization.
2. Run the Microsoft Dynamics CRM 2011 Setup program (CRM2011-Server-ENU-amd64.exe) and provide the following:
- Microsoft Dynamics CRM Server 2011 (no CAL limit):
- MQM2H-JYYRB-RRD6J-8WBBC-CVBD3
3. Accept the License Agreement
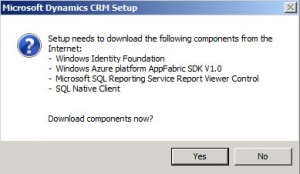
4. If setup detects missing components, you are prompted to install them as shown below.
5. Setup gives no indication that anything is happening during this period. We ran Task Manager and found the CPU spiked during this period as our indication something was happening. You will probably be required to restart the server.
6. If you’ve rebooted, run setup until you get to this step. Choose a location for the program files.
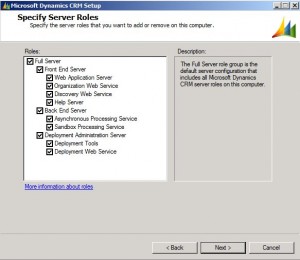
7. Choose Full Server as the Server Role. When it is selected all server roles will be installed on the server. See the illustration below.
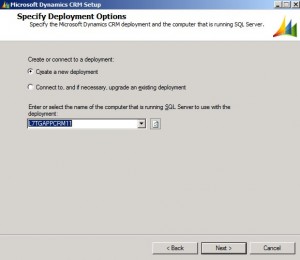
8. Create a New Deployment as shown in the screen shot below.
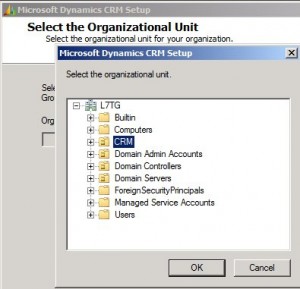
9. Select the Active Directory Organization Unit (OU).
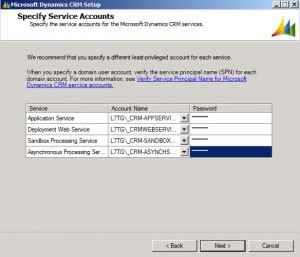
10. Use the accounts that were described earlier for the CRM Services as shown below.
Note that the drop down functions much like the method used to specify service accounts during a SQL Server 2008 R2 installation. In the Account Name field, be sure to specify the account using the Domain\account form and make sure that you enter the password correctly. The setup program has no lookup capability to validate you individual entries during this gathering of information stage.
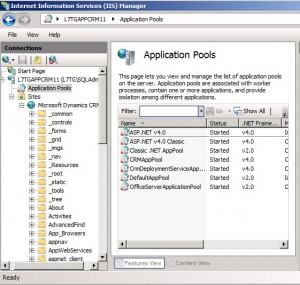
11. Next, select the web site and port number. Since we are installing all components on this server and are hosting no other sites, we chose to use the default web site and port 80. Creating a new web site would require you to specify a port other than 80. We believe this method make it difficult for users and never recommend it. When installed, the web site looks like this in IIS Manager.
12. Next, specify the mail server. Setup calls this the “e-mail router”. Make sure that your mail server is accessible from this computer as setup wi9ll validate this step at a later time. You may need to make changes in your mail server’s configuration to allow it to receive mail from this particular server. If not, then the server may reject all email sent to it as it will look like spam. Setup adds the server name to the PrivUserGroup.
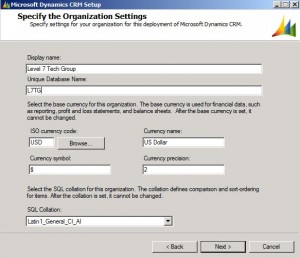
13. Specify the Organization settings as shown in the screen shot below.
We accepted the default values and customized the Display Name and corresponding Database Name.
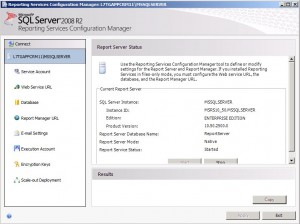
14. On the Reporting Services Server page, specify the report server URL . Note this is the address of the web interface defined by SQL Server Setup when the Reporting Service component is installed. We chose to use this computer during our SQL Server installation. Again, make sure that the url resolves because Setup will check during the installation phase. The URL is generally, “<server>/ReportServer” as shown below. Note that you have to run the Report Server configuration utility found under Programs -> Configuration Tools -> Report Services Configuration Manager.
15. Skip the Customer Experience Improvement step unless you really want to participate.
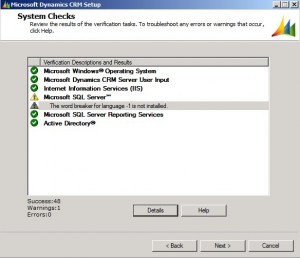
Setup will now validate the information you entered and report back any errors that it encounters.
We resolved numerous ones before getting the final report shown below.
Once any errors that are encountered are resolved, the Next button is activated and you can proceed.
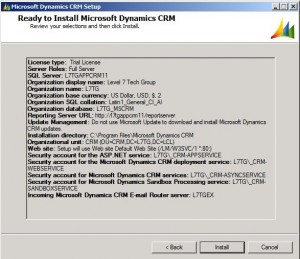
Click install to begin the process.
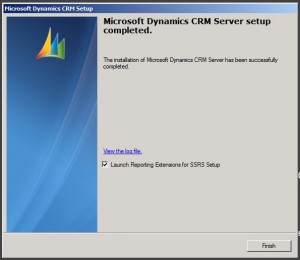
When complete, setup automatically transfers control to the Microsoft Dynamics CRM Reporting Extensions Setup. CRM Report Authoring Extension is a plug-in that obtains the metadata and data from Microsoft Dynamics CRM. This metadata is required to design and preview Fetch-based reports in Business Intelligence Development Studio. You find the SetupBIDSExtensions.exe in the /BIDSExtensions/ folder – just double-click.
And that completes the installation procedure. In retrospect the most trying aspect of the process was the fact that the setup program gathers information and there is no validation at each step of the process that would report back any errors that it encountered. Instead, it would validate all parameters in a single step, and report back a summary. You would then have to investigate the problems among the moving parts in your network infrastructure and correct them. Back in the setup program you clicked ht eBAck button to arrive at the page in question, make the correction and advanced through the pages where setup would once again validate the parameters before allowing you to proceed with the actual installation. Fortunately, you didn’t have to re-enter information that was already provided on your first pass.
Subsequent blog posts will focus on the CRM Client installation and functional assessment.
This posting is provided “as is” with no warranties, guaranties or any rights whatsoever. All content is based on the author’s experiences and opinions and is not intended to influence the actions of the reader.

This is very useful and well done! Thanks for taking the time to put it together!
Best,
Serra Smith
Pingback: Microsoft Dynamics CRM 2011 Evaluation – Part 3 | Level 7 TechnoBlog