As mentioned in Part 2 of this series on SQL Server Failover Clustering, the next step after Creating the Windows Failover Cluster is to Create the Microsoft Data Transaction Coordinator (MSDTC) Service. This post will present the detailed steps that I took to create the MSDTC failover cluster Service after the Windows Failover Cluster has been created.
Create the Starwind SAN Target
The Starwind iSCSI software runs as a service on your server. Launch the Management Console. Right-click Targets to start the Wizard. The following table shows the steps to take.
Steps
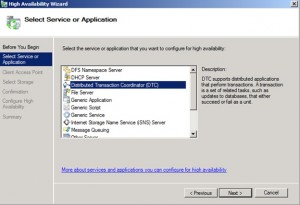
Launch the Failover Cluster Manager located in Administrative Tools. Start the wizard to create a High Availability Service or Application.
1. Select the Distributed Transaction Coordinator (DTC). Click Next to continue.
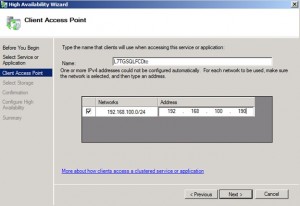
2. Define the Client Access Point in terms of a name and IP Address. This step is similar to the step taken in Part 2 in defining the Windows Cluster. Click Next to continue
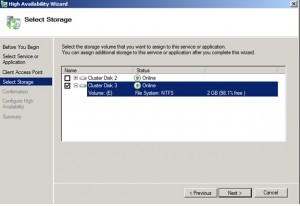
3. Select the Disk that will be used to support the service. You can only choose a disk drive made available by the iSCSI Initiator. Click Next to continue.
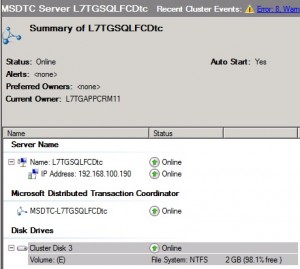
4. Summary
This completes the creation of the Data Transaction Coordinator Service. The next step is to Create the clustered SQL Server instances on each of the nodes in the cluster which is covered in Part 4.
This posting is provided “as is” with no warranties, guaranties or any rights whatsoever. All content is based on the author’s experiences and opinions and is not intended to influence the actions of the reader.


Pingback: SQL Failover Cluster – Part 2 | Level 7 TechnoBlog