As a Business Intelligence (BI) Build Engineerworking in Microsoft IT Services, I was brushing up on SQL Server 2008 High Availability options when I found two books on the subject in the Microsoft Library on the subject and checked them out. One is Allan Hirt’s book: Pro SQL Server 2008 Failover Clustering book (published 2009 by Apress) and the other is by Michael Otey called Microsoft SQL Server 2008 High Availability with Clustering and Database Mirroring, published by McGraw-Hill, 2010.
Allan Hirt started his career with SQL back in 1992. He’s consulted for Microsoft and Avenade and is an author and speaker at TechEd and SQL PASS. His web site is http://www.sqlha.com. If you’re interested in learning about setting up SQL Server 2008 for Failover Clustering this seems to be the definitive book.
Michael Otey is the technical director of SQL Server Magazine http://www.sqlmag.com/ and Windows IT Pro http://www.windowsitpro.com/. He is also president of TECA, Inc, a software development and consulting company. In his book, Michael explores High Availability in terms of Clustering and Mirroring and extends the discussion to Hyper-V virtualization and Live Migration support.
Allan Hirt’s book takes you on a quick tour of the SQL Server Availability options: Backup & Restore, Windows Clustering, Log Shipping, Database Mirroring and Replication. The author does an extremely good job of comparing Failover Clustering to the other options: Mirroring vs. Failover Clustering, Log Shipping vs. Failover Clustering, Replication vs. Failover Clustering, and even includes a discussion of Oracle’s Real Application Clusters vs. Failover Clustering.
But the primary emphasis is on the High Availability option of Windows Failover Clustering. In addition to SQL Server, Windows Clustering supports many other Windows Roles such as File, Print, WINS, DHCP, Distributed File System (DFS) and others. Perhaps because of its position as an application backbone technology, SQL Server 2008 appears to be the most important.
In the book, Allan takes you step-by-step through the creation of a clustered SQL solution including: a review of the hardware required, to support the Windows Failover Cluster service, setting up Windows Cluster Service, preparation for installing SQL Server in a clustered environment, the step-by-step installation , and, the administration of a clustered environment. This also includes installation from the GUI, command line and PowerShell. Finally, there is a chapter that focuses on virtualization with Hyper-V.
Always up for trying new things in the Level 7 Tech Group’s virtual world, I decided to follow the steps outlined in the book to build out a SQL Server clustered environment.
Step #1 – Create an iSCSI target (SAN)
Windows Clustering requires at least to nodes (Windows Server 2008 R2) and a common storage location, generally implemented as a Storage Area Network (SAN) or Network Attached Storage (NAS). I have to comment that these two terms, SAN and NAS are wonderfully confusing terms – almost as good as Windows Server 2008 and Windows 2008 Server or Windows 7 Phone and Windows Phone 7. In the case of the Server, the first is the product we’re all familiar with and the second is the free, Hyper-V core product. In the case of Phone, the first is what I call it and the second is Microsoft’s name for it.
Since, Level 7 Tech Group doesn’t have a NAS or SAN device, I chose to use the software solution that in Allan mentioned in his book. Starwind Software, http://www.starwindsoftware.com, publishes a free, iSCSI SAN Storage Solution. The idea behind this product is to present a disk file to a cluster node as an iSCSI target which allows the othe nodes to connect to it. I’m using a single SATA drive on my Hyper-V host for the SAN. In a small-scale environment you can configure a 64bit server with a number of SATA Terabyte drives to create a RAID array of your own choosing. The Starwind software runs as a Windows Service and presents the the RAID array as a SAN target (LUN). You can also find a free iSCSI target to download from Microsoft at http://www.microsoft.com/download/en/details.aspx?id=19867.
In order to download the free Starwind software, you’ll have to register on the web site. You’ll receive an email with the license file as an attachment. You’ll use it to activate the software using the Management Console. Starwind is locked and the free license provides enough features to support a multi-terabyte, two node failover cluster. In addition, your registration provides free support and in a few short days, a phone call from the sales department inquiring about your experience and satisfaction with the product and whether you wish to purchase the full-blown product. They’re pleasant, so be nice when they call. A number of videos and tutorials are also available from the web site; however, you will need to use your registration to access this content on the site.
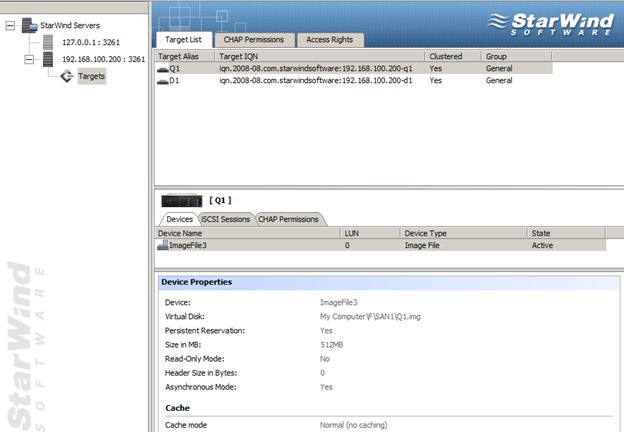
Run the setup program to install the service. Launch the Management Console. Set it to automatically start and register the license file sent to you. Once installed, create a target using a physical disk file. The steps are described in the Help file and a Wizard guides you through the steps below:
- Specify the iSCSI target name.
- Specify the storage type as a Hard Disk and the device type as a Physical, Image File Device.
- Select the method to add the image file device, generally Create new virtual disk.
- Specify the disk parameters: the name and location of an “img” file that will be created by the wizard.
In a two node cluster, you’ll need to create two files: a quorum and a data disk. A completed target is shown here.
Step #2 –Connect to the SAN using the Microsoft iSCSI Initiator.
At this point, I have a SAN available on my Hyper-V host. I’ll spin up two virtual Windows Server 2008 R2 Enterprise servers as my nodes in the cluster. Failover Clustering is implemented as a feature on Windows Server 2008 R2, so use Server Manager to enable it. Next, launch the iSCSI Initiator that’s found in Administrative Tools. The first time you start it, you will be asked to enable the iSCSI service and set it to start automatically.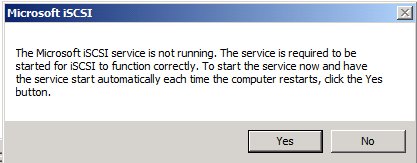
Next, select the target by typing in the IP address of the Starwind SAN as shown below and click Quick Connect.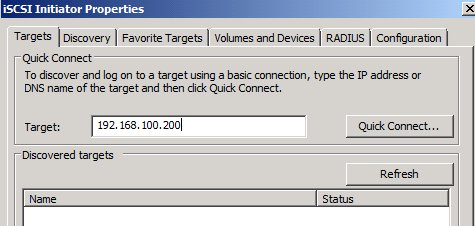
The two files you created will automatically be discovered and show up as Inactive.
Select each one, click Connect and the status changes to Connected.Click on the Discovery tab where you’ll find the connections as shown below.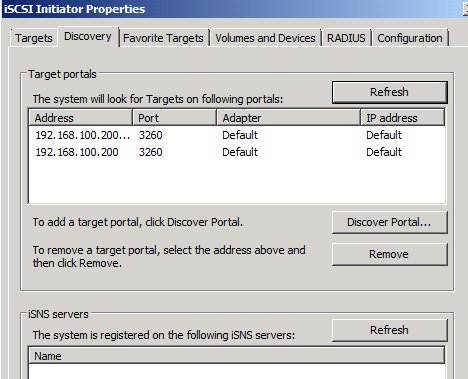
In the Favorite Targets tab you’ll find the devices as shown below.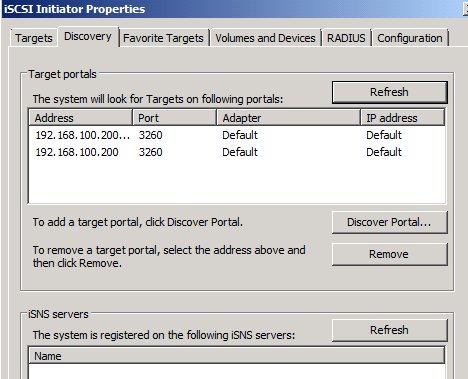
In the Volumes and Devices tab, select the devices and click the Auto Configure button. This insures that the devices will start automatically.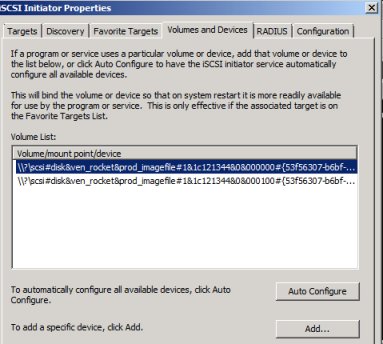
Initialize the target disks by starting Server Manager. Go to Storage | Disk Manager.
You will see the two disks appear as Basic disks. Click on each to bring them online. Next, click each one to initialize them. Finally format them and assign a drive letter and volume name to each. The end result is shown below.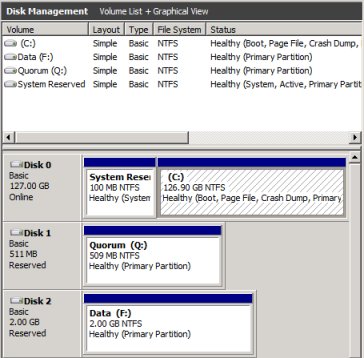
Step #3 – Create the Windows Cluster.
In this step, I’m creating a Windows Failover Cluster for a simple file share. In the next post, I’ll build on this foundation to create the SQL Server cluster. For now, make sure you have a Windows Feature or Role that is enabled on your two nodes that you would like to use. I’m choosing a file share to host on my SAN because it’s generally the easiest to set up and get early success with.
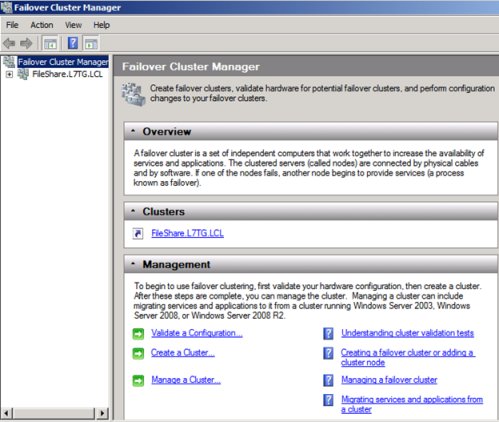
Launch the Windows Failover Cluster Manager from Administrative Tools. There are three basic functions as shown that are performed by the management console:
- Validate a configuration,
- Create a cluster, and
- Manage a cluster.
Each of the takes as an associated link to a Microsoft resource to provide help; of course, you can always Google for additional assistance.
Take the steps in order to create your service. Perhaps the most important is to use the Validate Cluster wizard. Specify the two nodes with Failover Clustering enabled. The wizard runs a series of validation tests on the network, disks and Windows services on the nodes and presents you with a report showing success or any failures that require remediation. If you don’t get a passing grade on this report, do not try to create a cluster – it will fail.
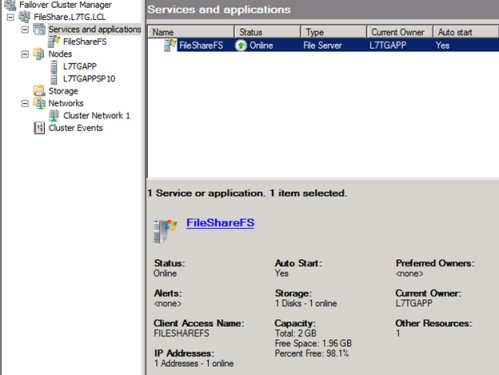
Use the Create a Cluster wizard. I’ve created a File Share Service as shown in the screen schot below.
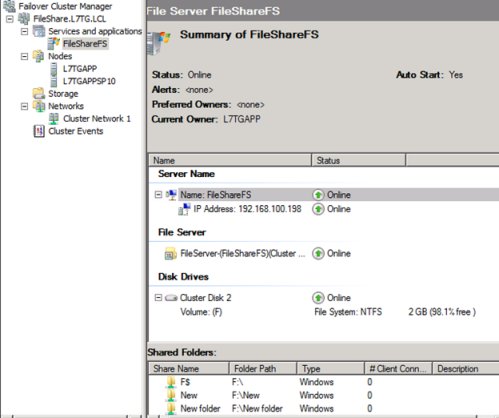
The Summary view shows the cluster name and IP address as it is known on the network, participating nodes, disk storage and the network.
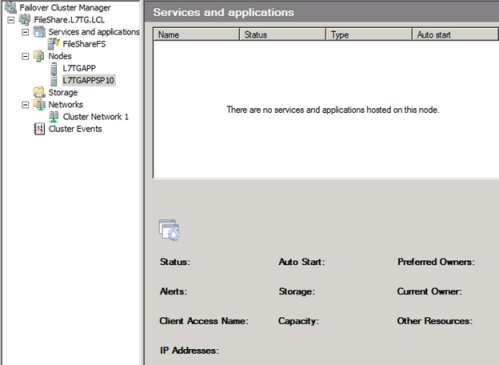
Checking the nodes, you can see that the L7TGApp node is hosting the service.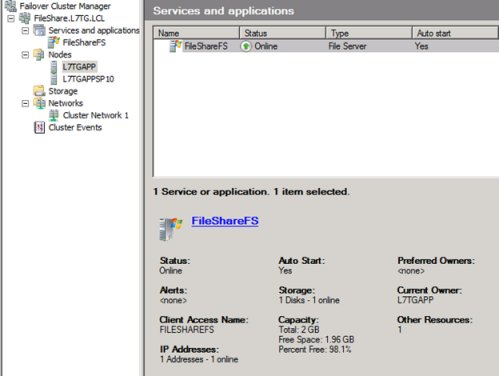
The L7TGAPPSP10 node is passive.
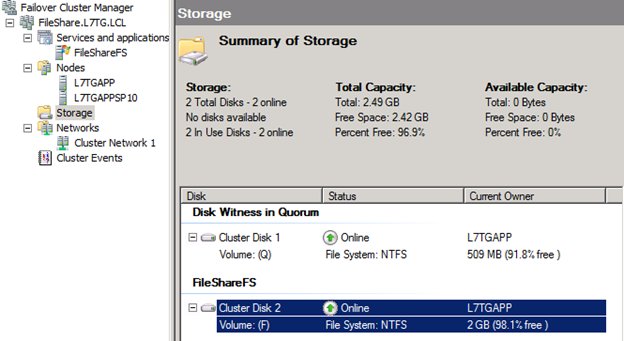
The Storage view shows the Quorum resource as well as the disk containing the file share data.
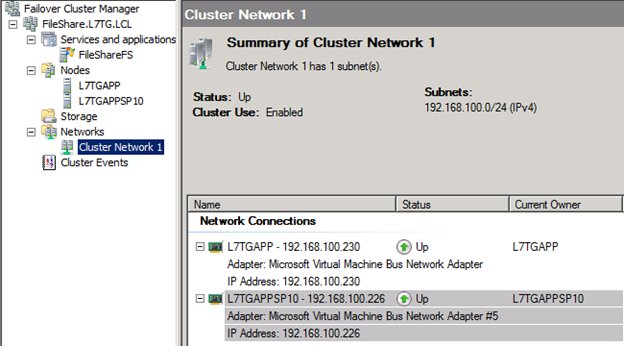
The Network view details the IP address of the Cluster and the FileShare service.
Now, if I shutdown the active node, L7TGAPP or the server experiences an outage, then the passive node L7TGAPPSP10 will take over. Alternatively, you can transfer the active role to the passive node by right-clicking the service and select the “move this service or application to another node.”
There you have it – a Failover Cluster supporting the File Service role. The next post will create a SQL Server 2008 failover cluster.
This posting is provided “as is” with no warranties, guaranties or any rights whatsoever. All content is based on the author’s experiences and opinions and is not intended to influence the actions of the reader.

Pingback: SQL Failover Cluster – Part 1 | Level 7 TechnoBlog
Pingback: SQL Failover Cluster – Part 2 | Level 7 TechnoBlog