In the previous post in the BPOS series, I gave an overview of the service offering and covered the steps that I took to set up a 30 day free trial of the entire BPOS Suite: Exchange, Communicator, LiveMeeting and SharePoint.
This post will focus on setting up users, mail boxes and the Single Sign In client.
Getting into Exchange
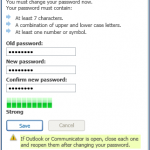
The first thing I did was create a few Exchange users so I could route some test messages. Each user will consume a license and be assigned an email address. You can also create addresses for meeting rooms, contact, and distribution groups. Each user can be assigned an alias as well. When you create a user, an email is sent to the user’s contact address similar to the one sent to the administrator. The email contains the initial password and the address to the company portal. During the initial logon, the user must change their password.
The client
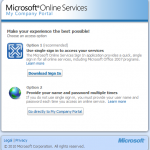
A user can access their Exchange Online mailbox in two different ways: Outlook Web Access (OWA, https://mail.microsoftonline.com) and the Outlook client on their workstation. In fact when the user logs on to the company portal (home.microsoftonline.com), they are presented with a
explanation of the two options that can be used from their workstation: Single Sign In, which is preferred or sign in to each service each time you connect.
When using Single Sign In, an additional Outlook profile is created on your computer for Online Services and is automatically invoked by Single Sign In when you launch Outlook. The previous profile remains untouched but must be selected when using Outlook while not connected online. It’s actually a pretty cool implementation!
Online Services Sign In
I recommend that you download and install the Single Services Sign In client software on your first visit to the My Company Portal. Microsoft .NET 3.5 or above is required. The setup program checks and provides you with a link to the Download center to install it. I suggest rebooting. You’re not required to but I like to get those bits lined up from the beginning just to make sure I haven’t left over any artifacts from previous work.
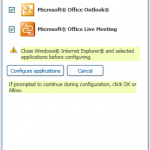
Connect to the My Company Portal and choose to download and install the client. This time it will determine if the appropriate .Net version is installed, then proceed with the installation and configuration of your Internet Explorer browser an your other Office applications.
A launch icon is placed on your Desktop. Launch it for the first time to change your password and set options.
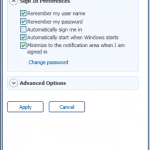
You can automatically launch the client when you login to your computer and optionally to automatically sign in to Online Services. Also on the first login, the home screen asks you to configure the applications that your licensed and enabled to use. I’ve set the program to remain minimized in the notification area of the task bar when signed in. This way I can right-click the icon, scroll to Launch and choose which program I want to start. Having the Sign In program minimized frees up screen space.
Testing
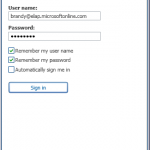
I set up the client software on a laptop, my development computer and the XP Virtual client that is available on the Windows 7, x64 bit platform. Login in was easy. At the Home page,
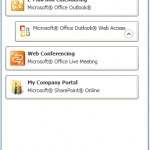
you can select which application to launch or if minimized launch from the notification area of the toolbar. I was able to send and receive messages among the user accounts that I created. I was able to set up a resource for a conference room and use the Calendar Scheduling Wizard to set up a meeting request invitation. All functionality in Exchange was present in the test. But then, why shouldn’t it be? It’s Exchange, right!
Next steps …
The next steps involved setting up and running through some tests using: Communicator, Office Live Meeting and SharePoint. Stay tuned…
This posting is provided “as is” with no warranties, guaranties or any rights whatsoever. All content is based on the author’s experiences and opinions and is not intended to influence the actions of the reader.

Pingback: BPOS for ELAP … the other communication services | Level 7 TechnoBlog
Pingback: BPOS for ELAP … results | Level 7 TechnoBlog
Pingback: BPOS for ELAp … the results | Level 7 TechnoBlog
Pingback: BPOS for ELAP … the conclusion | Level 7 TechnoBlog
Pingback: Eastside Legal BPOS … Follow-up | Level 7 TechnoBlog