Veeam 7 now has an “extract” utility that can be used to recover Virtual Machines (VMs) from a full backup (.VBK) file. This is a perfect solution for someone using Reversed Incremental mode. Reversed Incremental means the most current backup is always available. Using the Extract utility, you can directly restore from a backup without using the B&R server
The objective is to extract the compressed files that comprise the VM to a folder on a server. From there you can upload the files to the appropriate VMware datastore. You can then import the configuration file into the vSphere inventory.
The tool can be used independently on Windows and Linux computers because it does not rely on any interaction with Veeam Backup and Replication. This can be considered as part of a disaster recovery tool kit. The method described below can be used to recover Virtual Machines in the event that the Veeam Backup and Replication service is down but access to backup repositories and VMware datastores are on line.
The utility can be run from a GUI on Windows or the command line in interactive or regular mode.
The utility is present in the C:\Program Files\Veeam\Backup and Replication\Backup of the B&R Backup Console and Proxy servers.
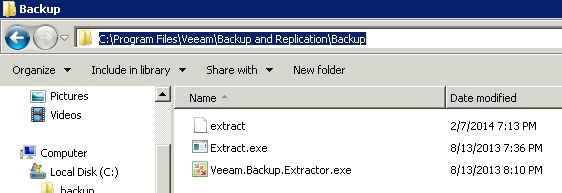
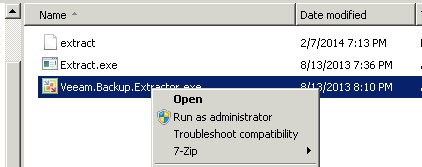
You can run it from any of those servers by clicking on the Veeam.Backup.Extractor.exe, running as Administrator. Running the extract utility from the server with the repository where the VM is located is faster than running it across the network.
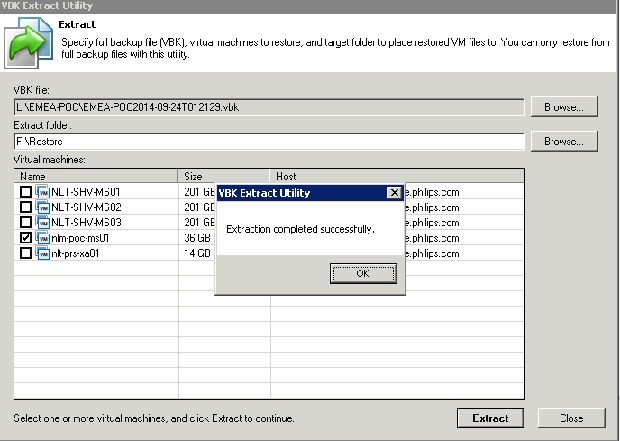
This example shows the recovery of a VM called “nlm-poc-ms01” from the EMEA-POC backup on the REPO_NL_PY23 repository to a local folder on the B&R Console server.
Navigate to the extract utility location, right-click and “Run as Administrator”.
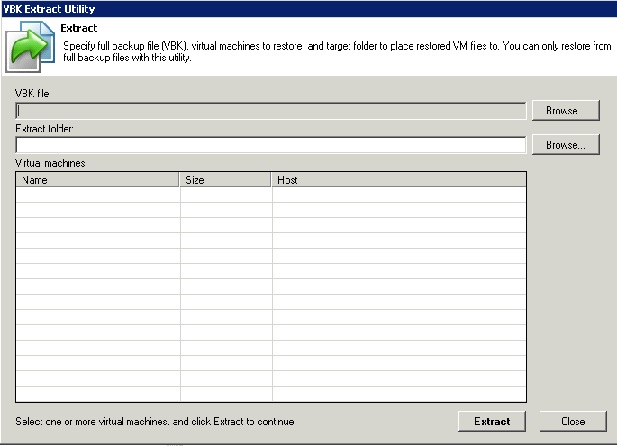
Select Browse to find the appropriate VBK file. You should have a drive letter mapped to the appropriate repository. In this case L: is mapped to the repository found on nlm-vea-py23.
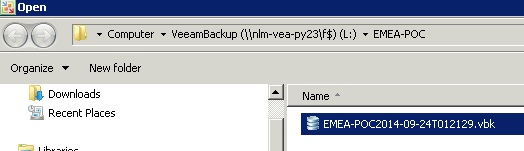
Click Open.
Place a check in the VM you want to restore. Click the browse button to specify an Extract folder. If you are using the nlm-vea-bk01 server, choose F:\Restore
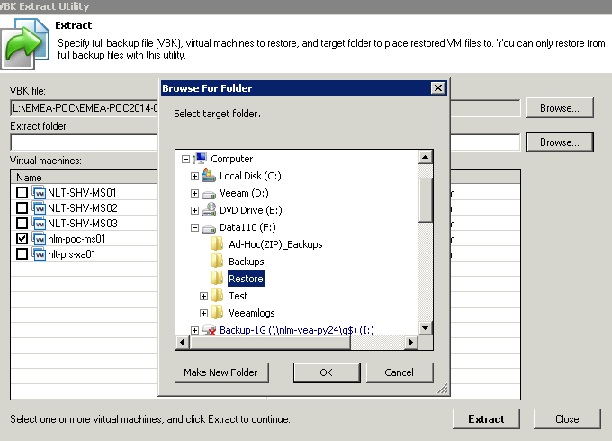
Click OK.
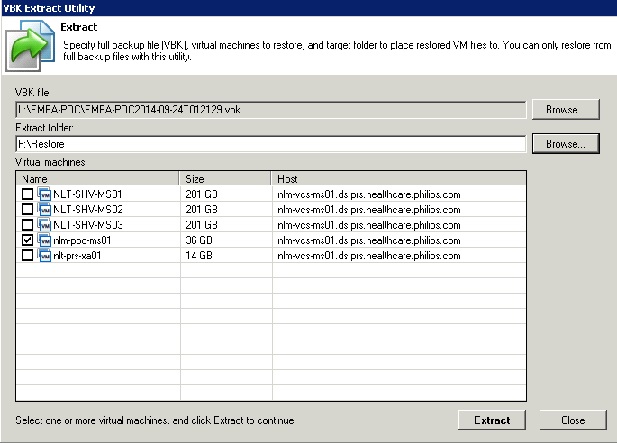
The utility will create a folder under the Extract folder to contain the VM files. Click Extract.
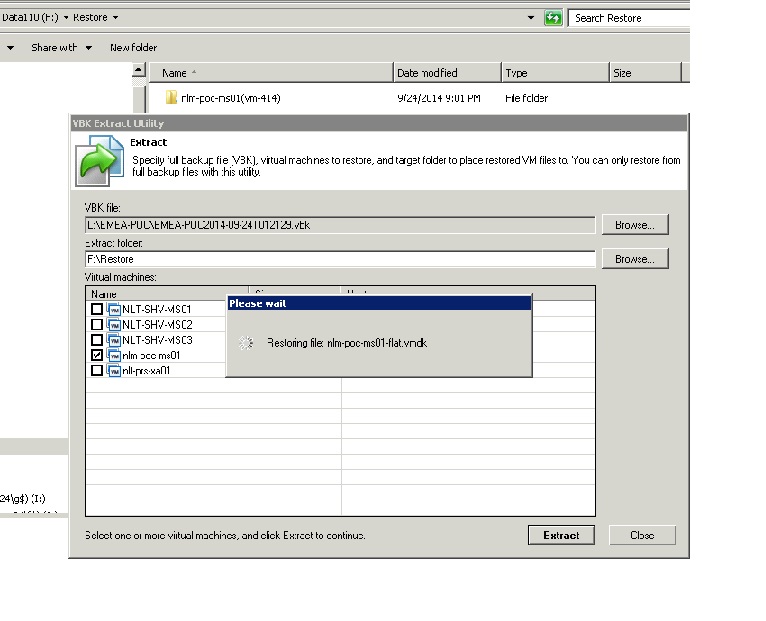
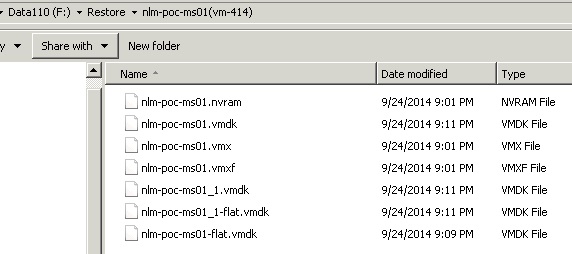
When you are finished, the files comprising the VM are stored in the location specified.
Use the most appropriate means to upload the files to the vSphere datastore and add the VM to inventory.
Reference:
http://www.virtualtothecore.com/en/veeam-extract-utility-quick-restores-without-veeam-server/
This posting is provided “as is” with no warranties, guarantees or rights whatsoever.