
Veeam recently announced an additional backup product to compliment their Availability Suite V8 solution. It’s called Veeam Endpoint Backup (VEB). As of this writing it is Beta Release. VEB is a standalone backup solution for physical computers.
It uses a a proprietary method similar to VMware’s vCenter Converter (P2V) and Acronis True-Image products to create an image backup of the physical machine which is suitable for bare metal restore to the same or a different piece of hardware.
VCenter Converter transforms a running Windows or Linux physical machine or a Hyper-V, VHDK virtual machine file into a VMware virtual machine VMDK format. Acronis True-Image transforms the running physical machine into full system image-based file, TIB that can be used for bare metal or individual file recovery. VCenter Converter is definitely an enterprise product, while Acronis True-Image is a consumer-based application. Endpoint Backup compliments the Veeam Backup and Replication suite of products by extending the Veeam ecosystem to physical machines.
Endpoint Backup will create a backup file of an OS running on a C: drive to attached storage on say a D: drive. It will also backup to a network file share or to a Veeam repository. I haven’t tried this yet in out lab but I would speculate that since it creates VBK files in it’s own folder there that it would show up under Disks or Imported Disks in the Veeam Console.
Once the backup is configured, it can be set to run on a schedule. The number of restore points is also configurable to allow point-in-time restore operations. You also have the ability to perform a restoration of individual files from the backup.
As I mentioned earlier in the post, Endpoint Backup installs the Microsoft SQL Server 2012 Express LocalDB, SQL 2012 Management Objects and SQL System CLR types. I have not had an opportunity to load the SQL Management tools to allow me to peer into the local database to see exactly what’s inside. As I said, lots of industrial-strength moving parts to be a consumer product but not bad if you are using it to backup that physical web or file server.
In my evaluation, I used a Dell Inspiron 8600 laptop with 1 Intel Pentium M 1.5GHz processor and 2GB or RAM and the usual slow 5400 RPM laptop HDD all running on Windows 7 Ultimate. This is one s l o w computer! For the backup repository, I attached a Western Digital 500GB, 7200 RPM disk using a USB 2.0 connection.
You can freely download the software from the Veeam website, http://go.veeam.com/endpoint. You just need to register before downloading.
The plan is to:
- install the program,
- take a backup to attached storage,
- create rescue media,
- perform a bare metal restore.
Let’s get started, Step 1.
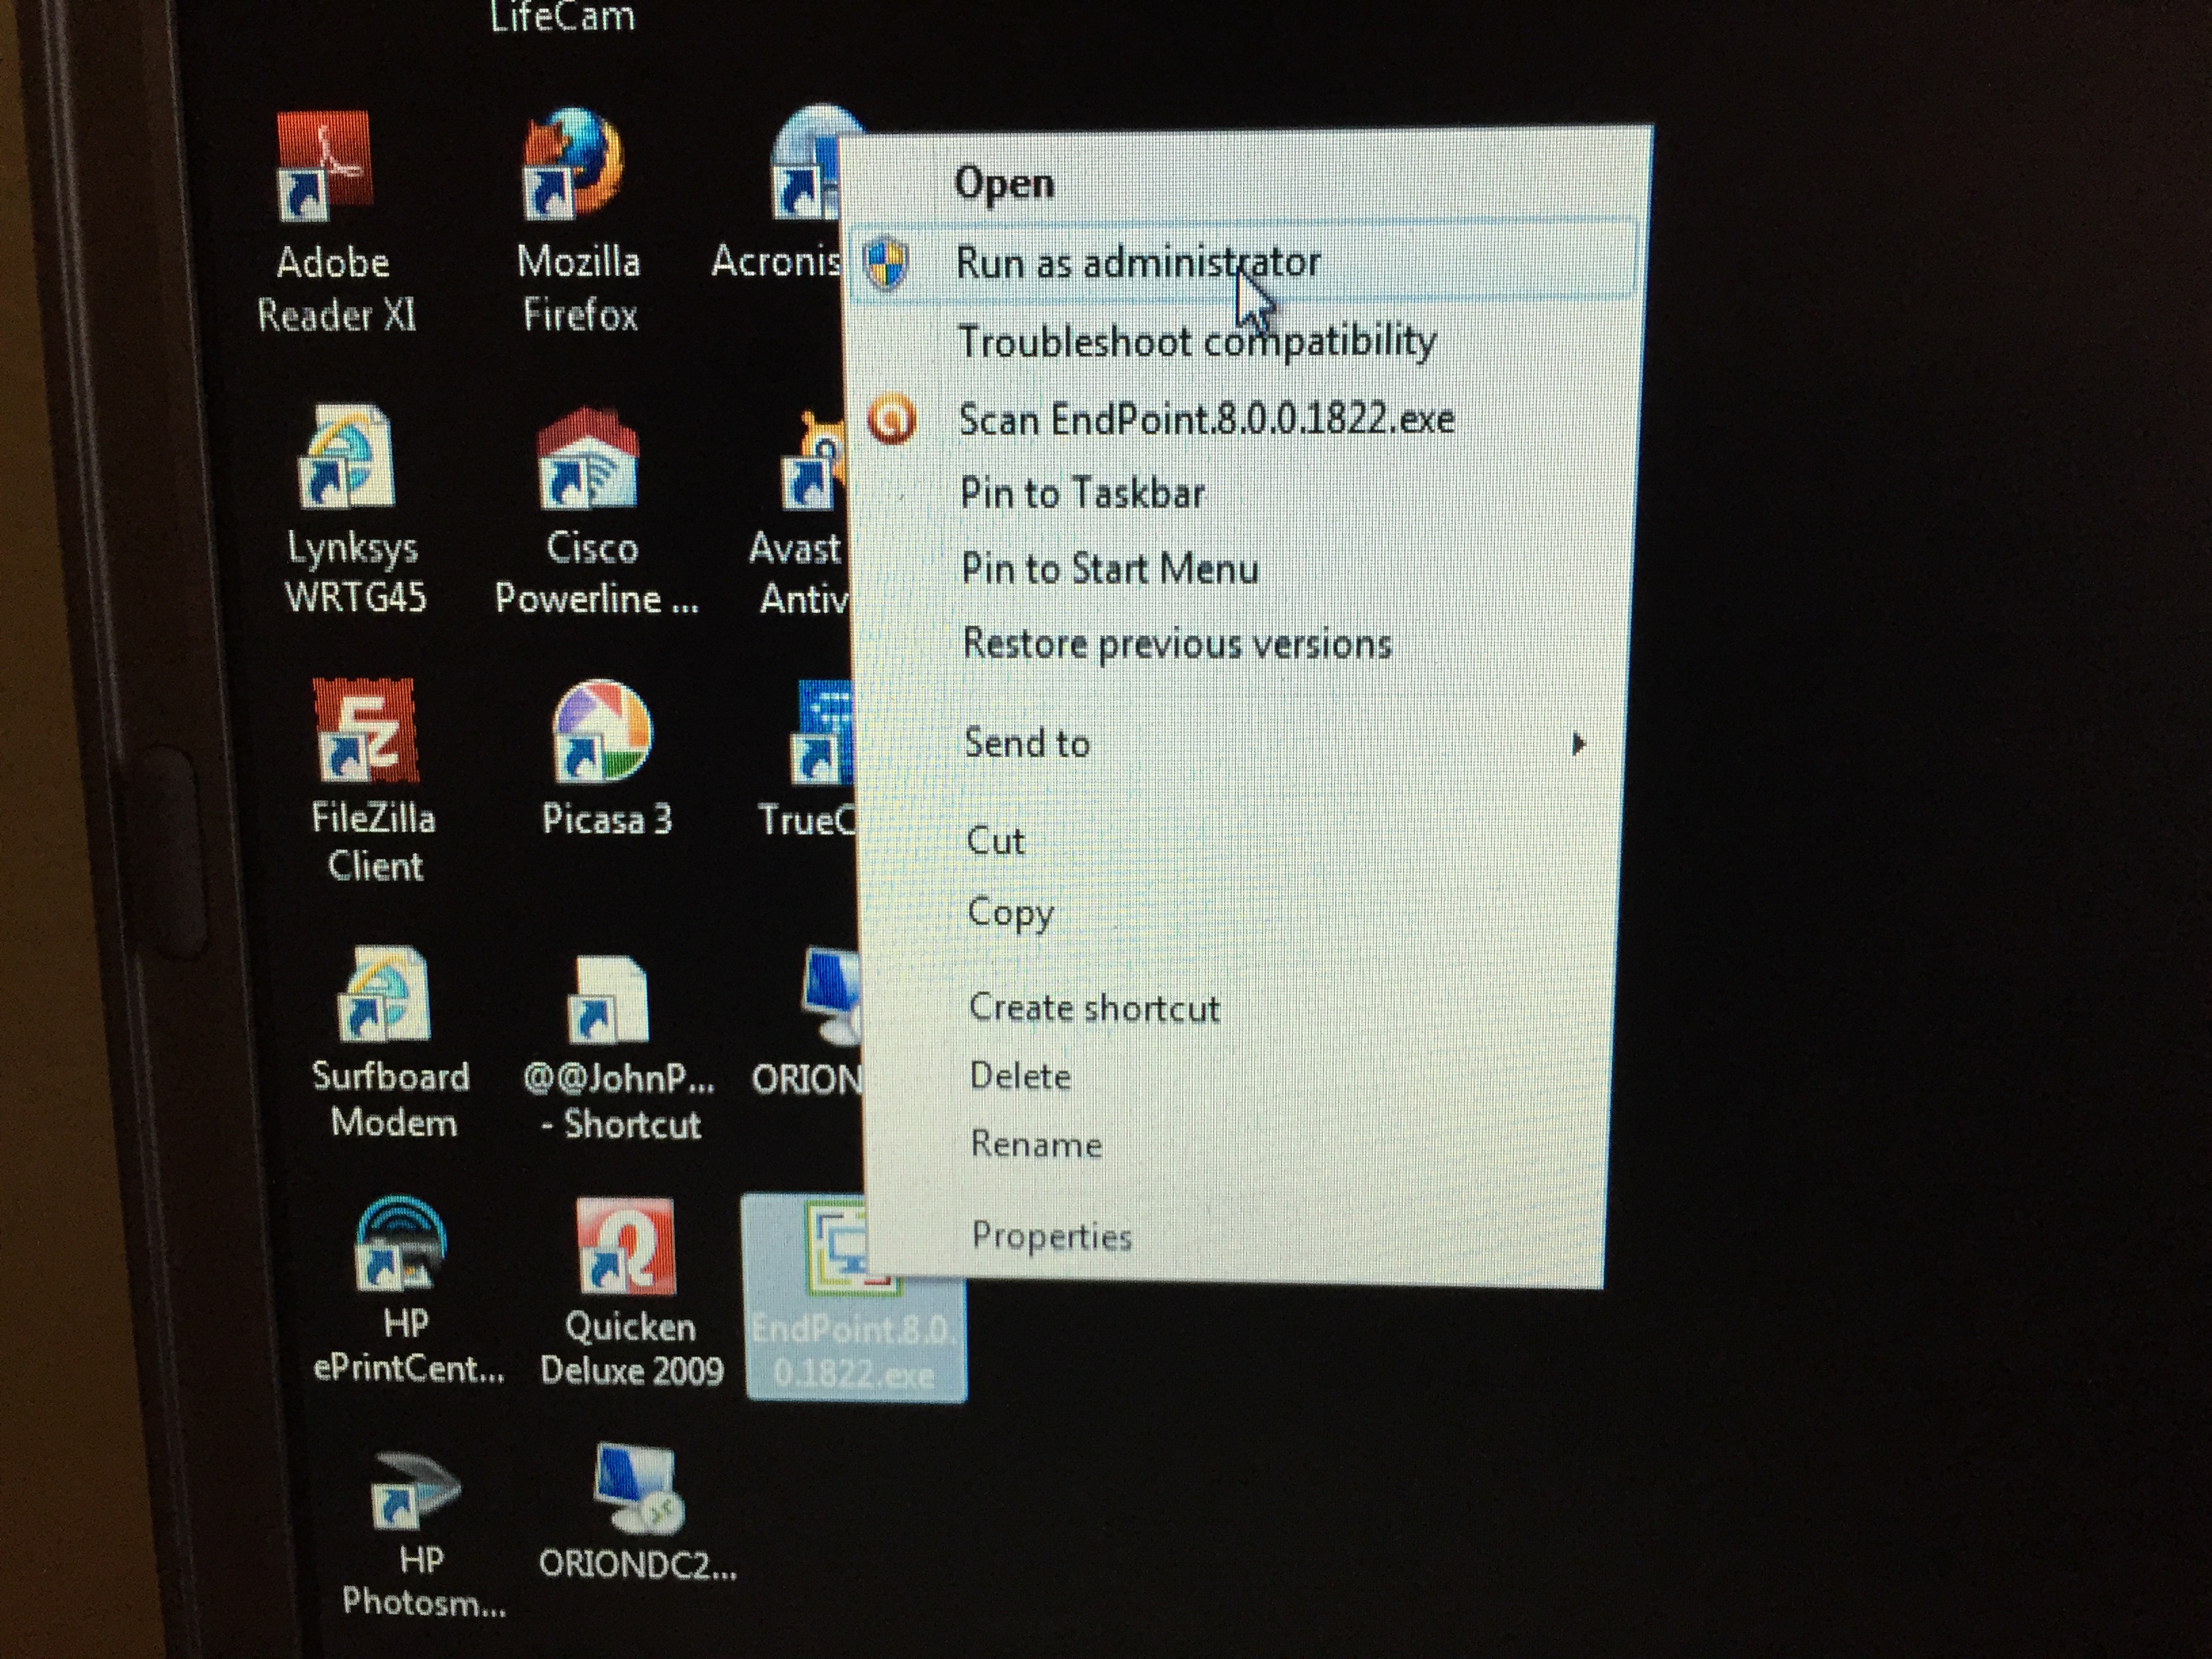
I’ve got the setup program on my desktop. Righ-click the icon and choose Run as administrator as shown below.
Click through the License Agreement and the summary screen. While installing, I ran into trouble with Avast anti-virus mistaking a Veeam component for a root kit.

This is documented in a Veeam KB article. The real workaround is to start over and disable Avast. Once that is complete, the setup program will want to configure a backup and a rescue media. I recommend you skip that for now and revisit it later.

The options are available from the Windows lozenge or from the Endpoint Backup Control Center in the Notification area of the task bar.
In the event the service doesn’t start, disable the Avast shields and the program will run. VEB will only run with Avast shields disabled. I would then enable the shields but not set up a schedule, Just disable the shields when running an ad-hoc backup.
Step 2, configure a backup. The backup wizard runs and provides three modes as shown in the screen shot.
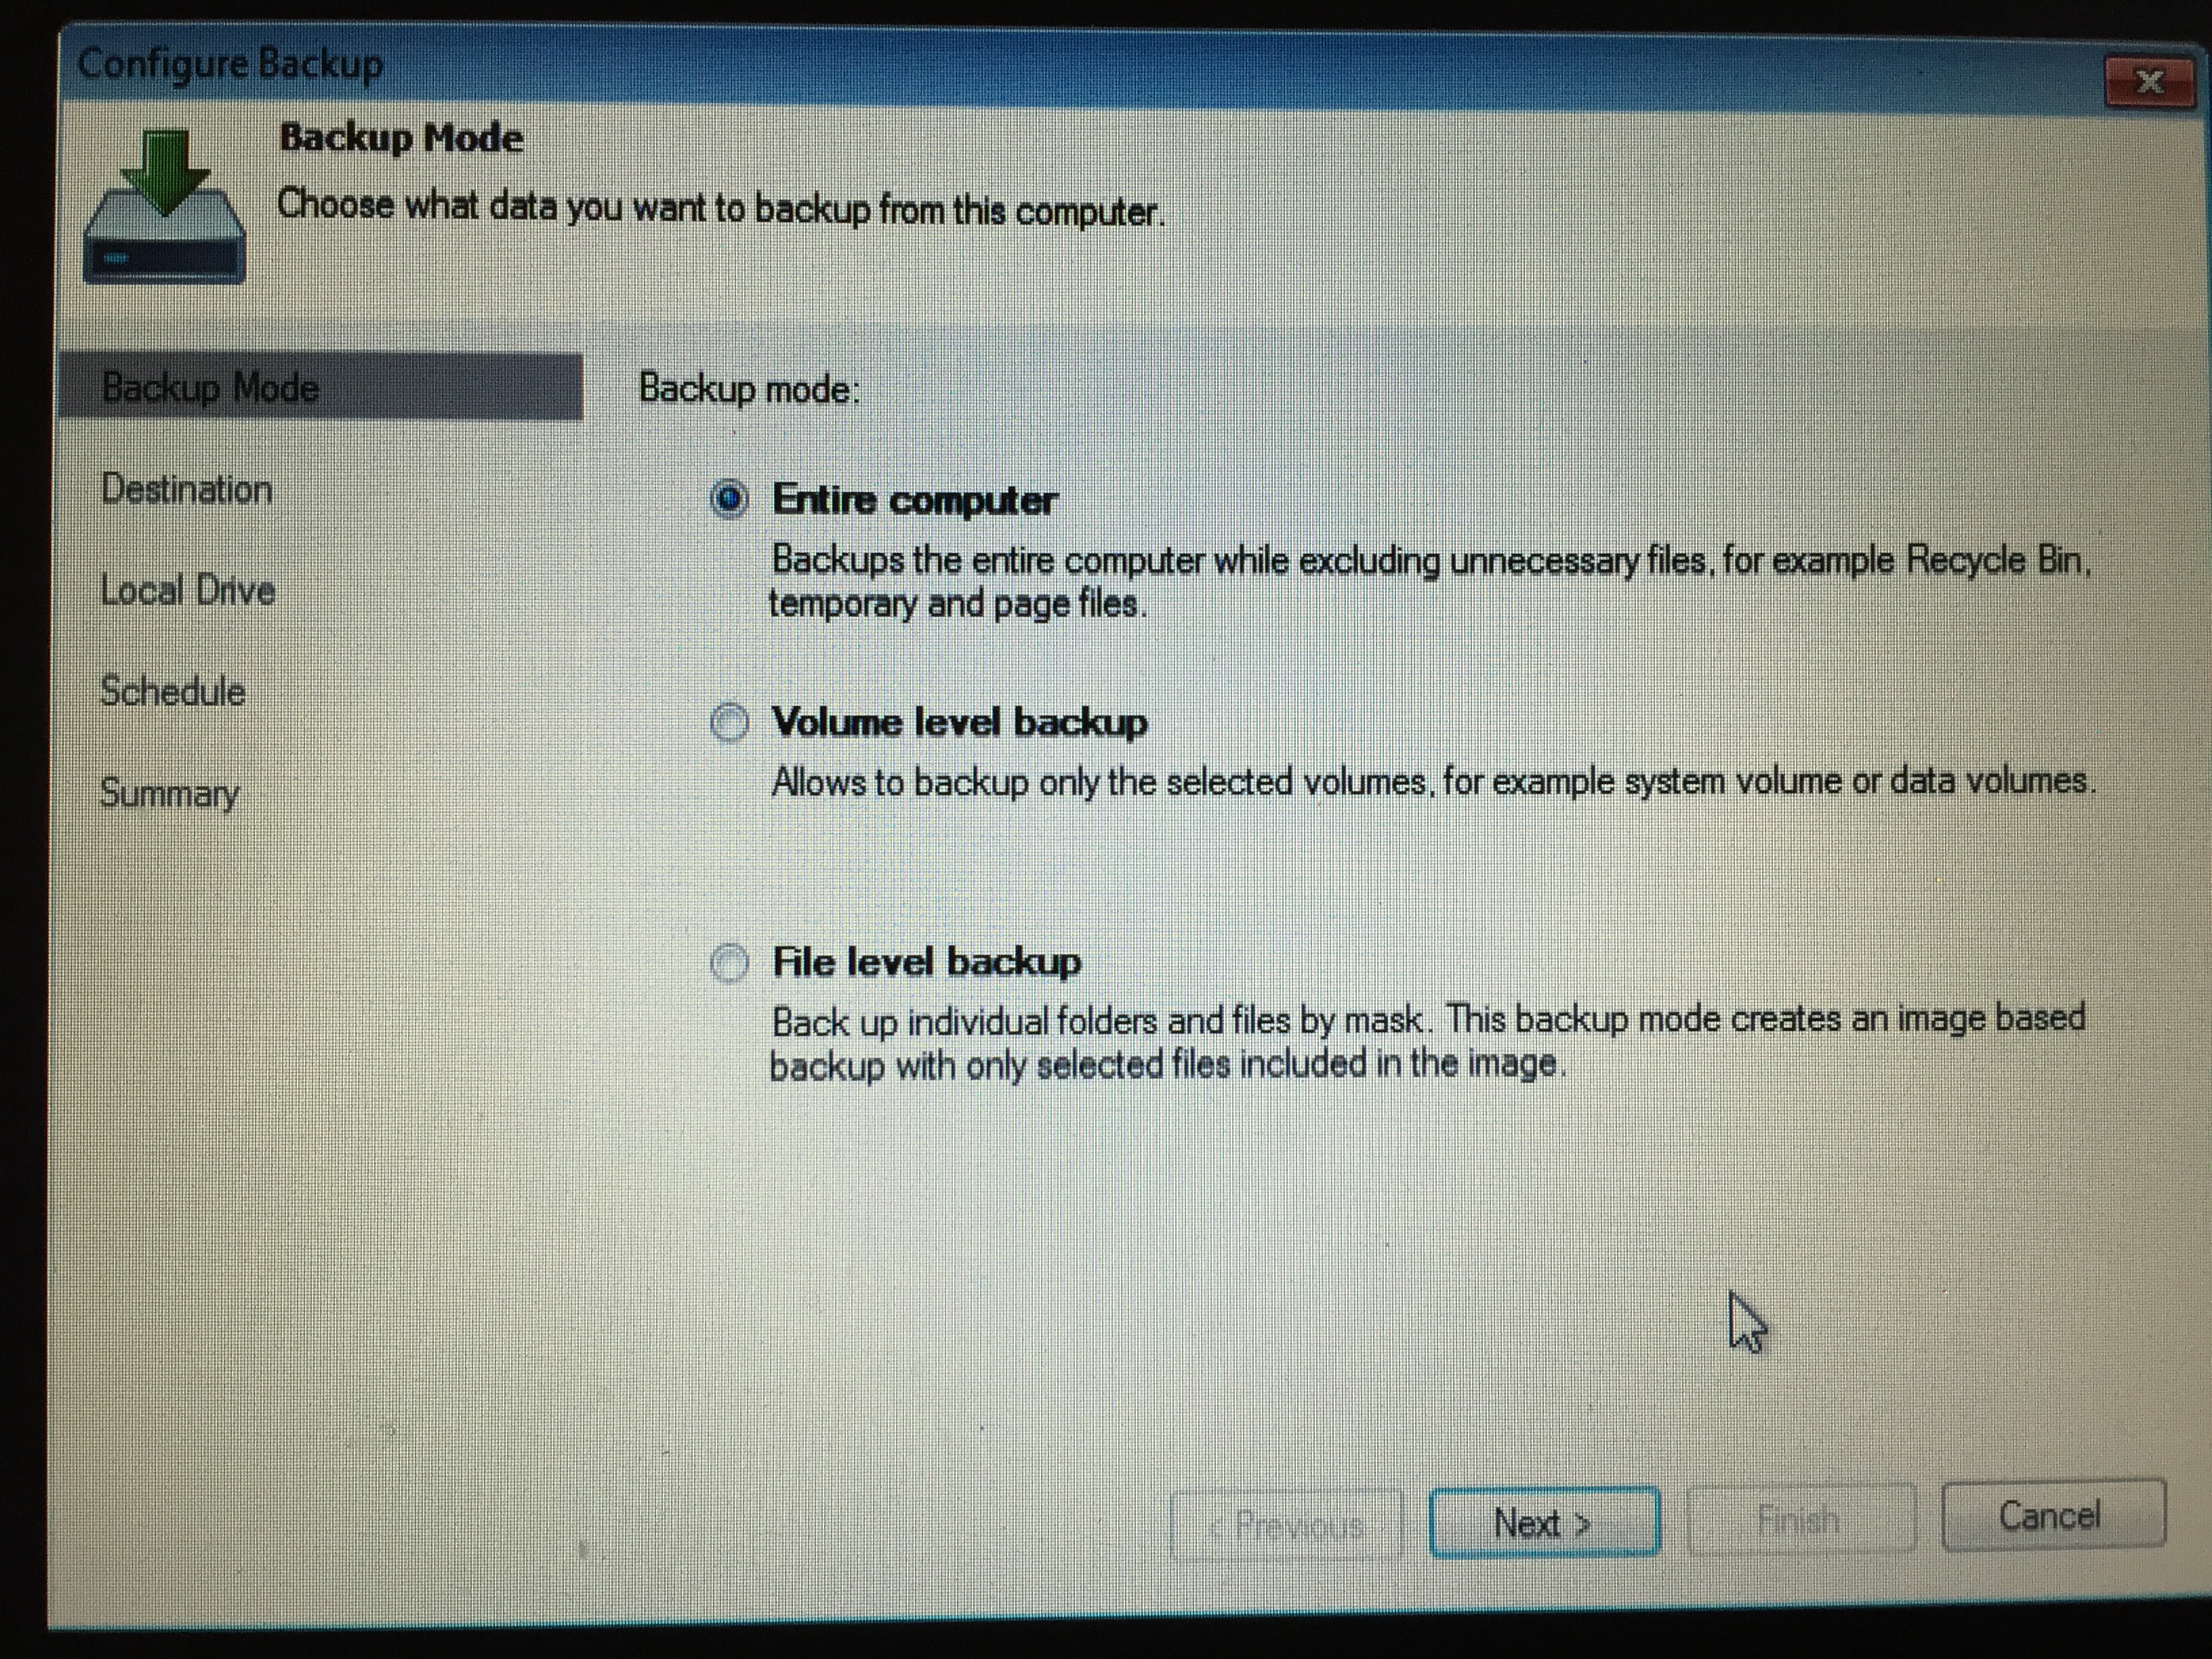
I chose the entire computer to a local drive. When you start it, the progress screen show either elapsed time or size.

Step 3, create recovery media. The most common media to use on a computer that you have keyboard access to would be USB stick. You need a 32GB stick. Anything smaller won’t work. Since, I’m evaluating this product with the goal of backing up servers in a datacenter, I’m going to go for the option of using a CD/DVD RW drive. All servers since Windows 2008 require a DVD to support the installation media. My thinking is that once the media is created, it can be left in the drive. A reboot generally bypasses the DVD if there is no keystroke in 10 seconds. In the event i would need to boot from the media, I can use the ILO to remote in and press the Any Key.
Back to the Start Menu, select the Create Recovery Media wizard and choose the DVD option.
When completed, you see a summary. I’ve opened an Explorer window to the CD shown below.

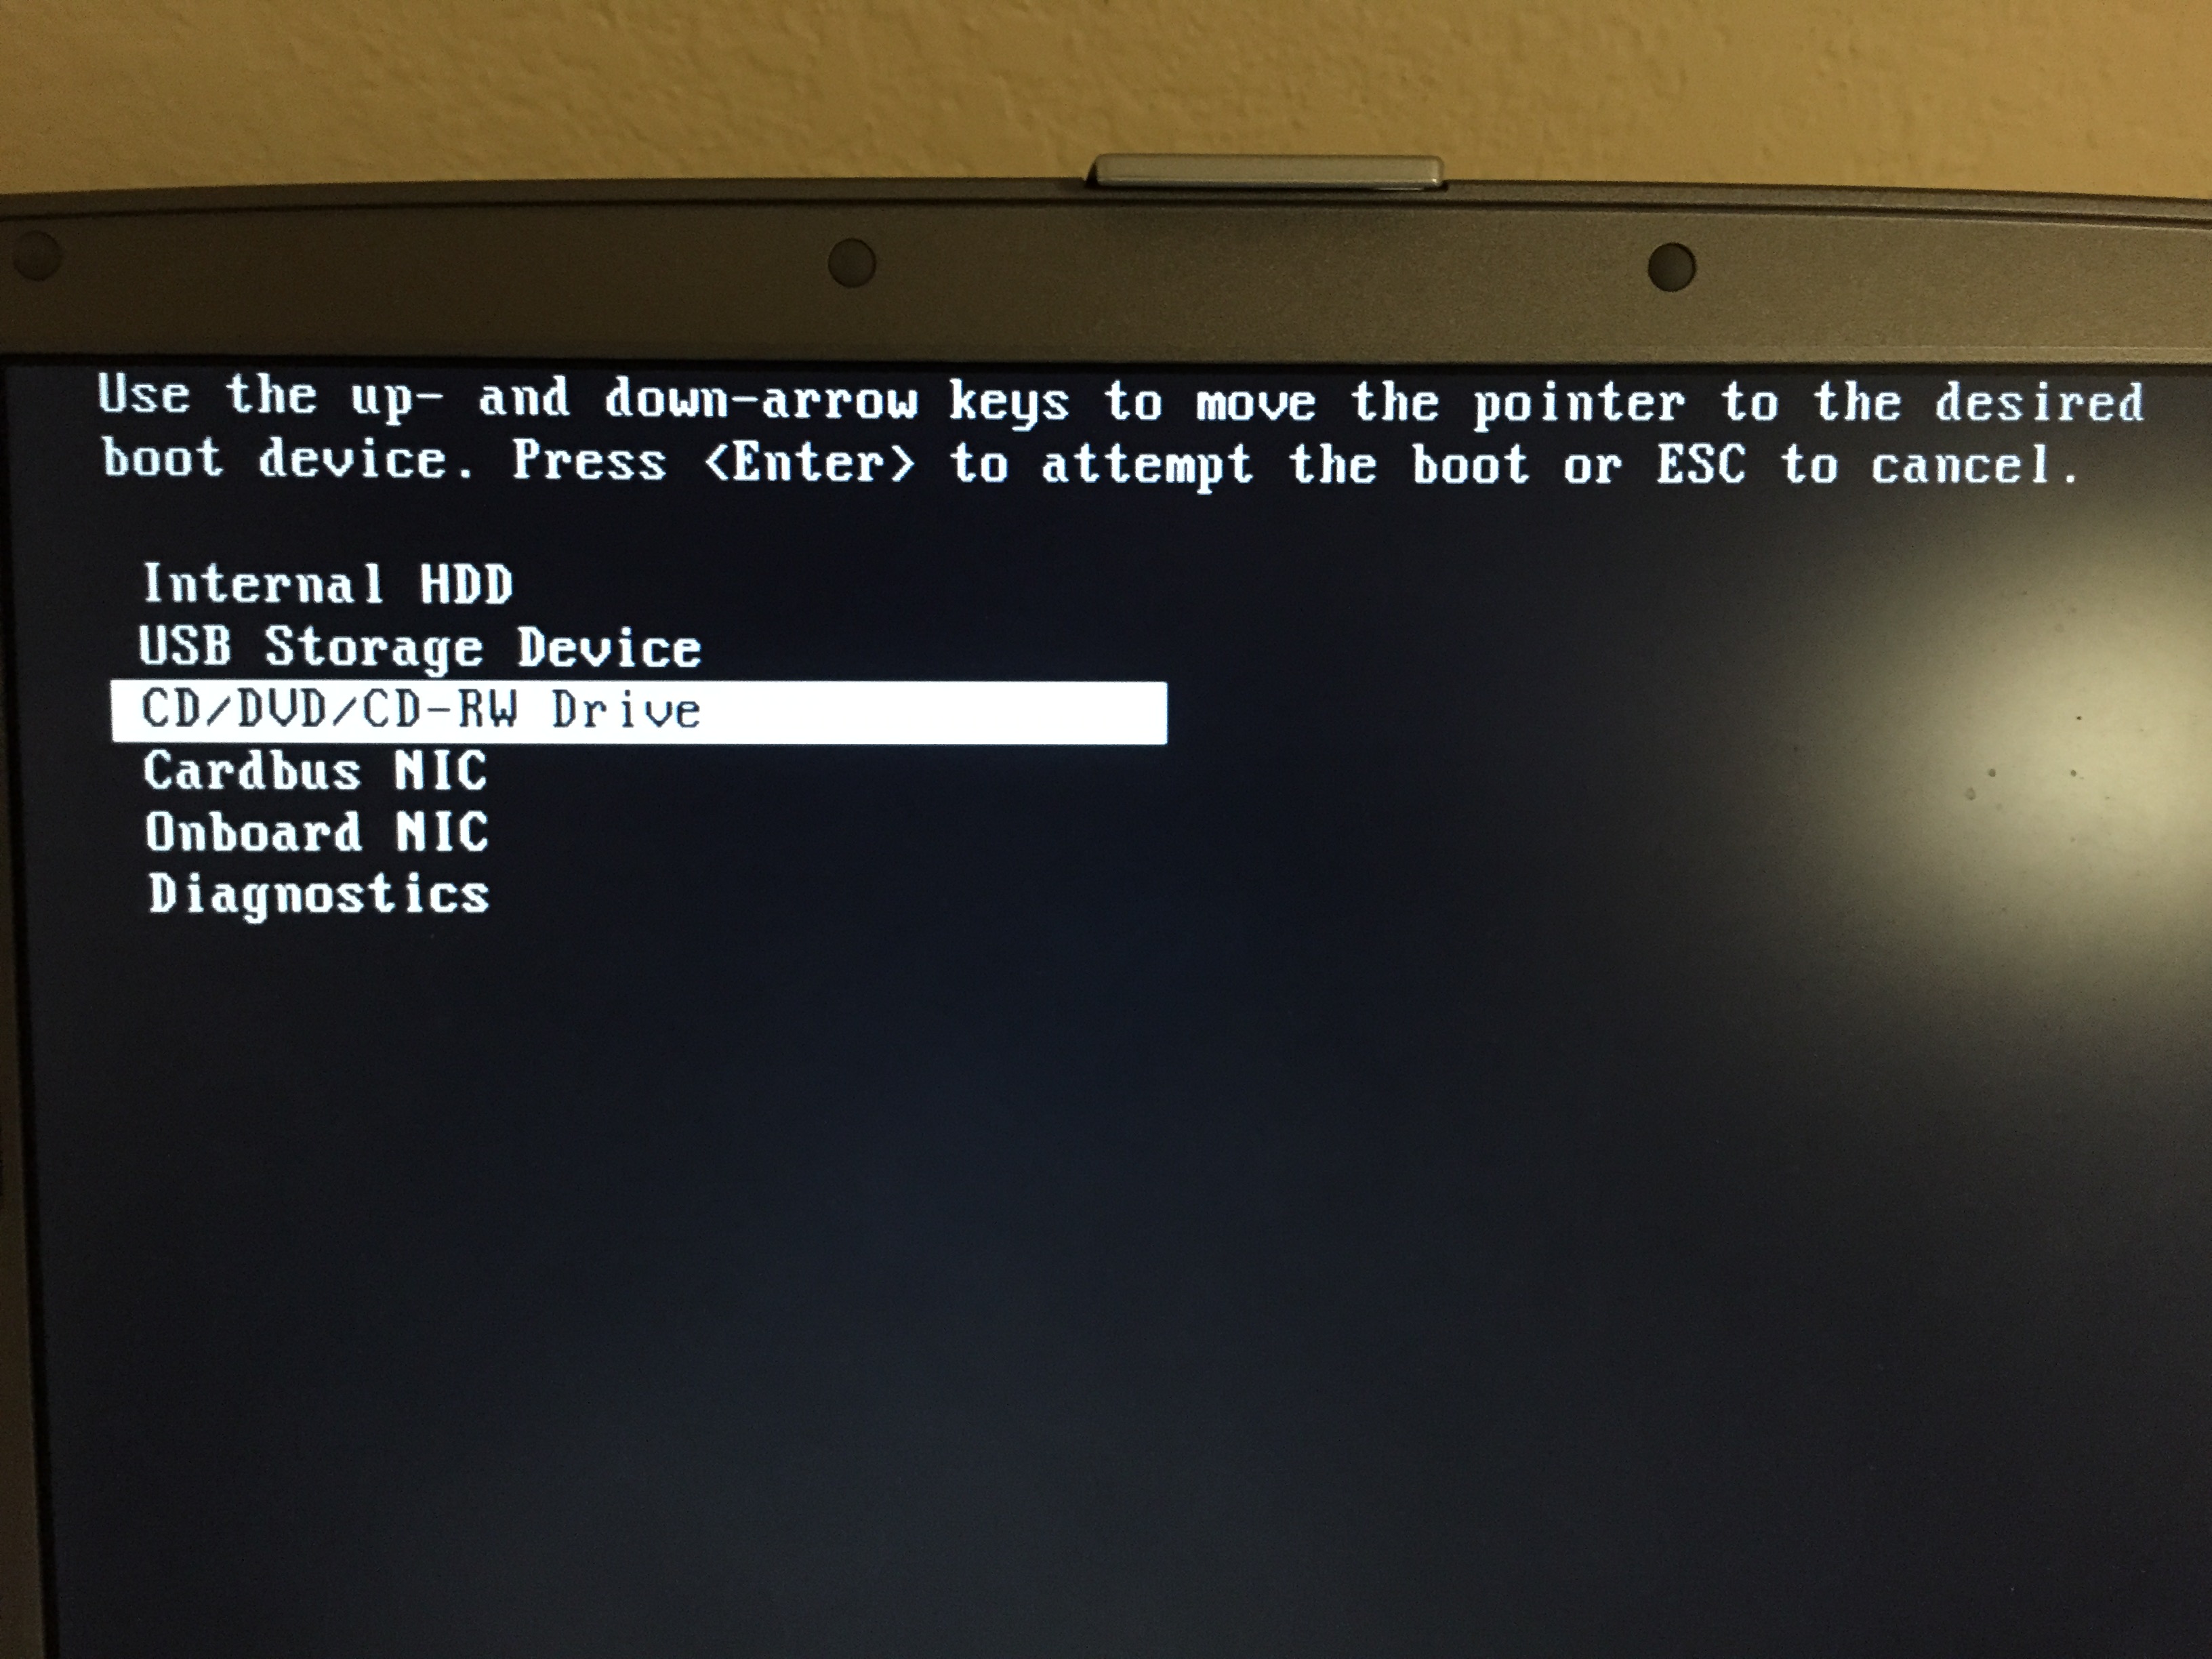
Step 4, bare metal restore. On the laptop, I clicked the f12 key to change the boot order as shown below.
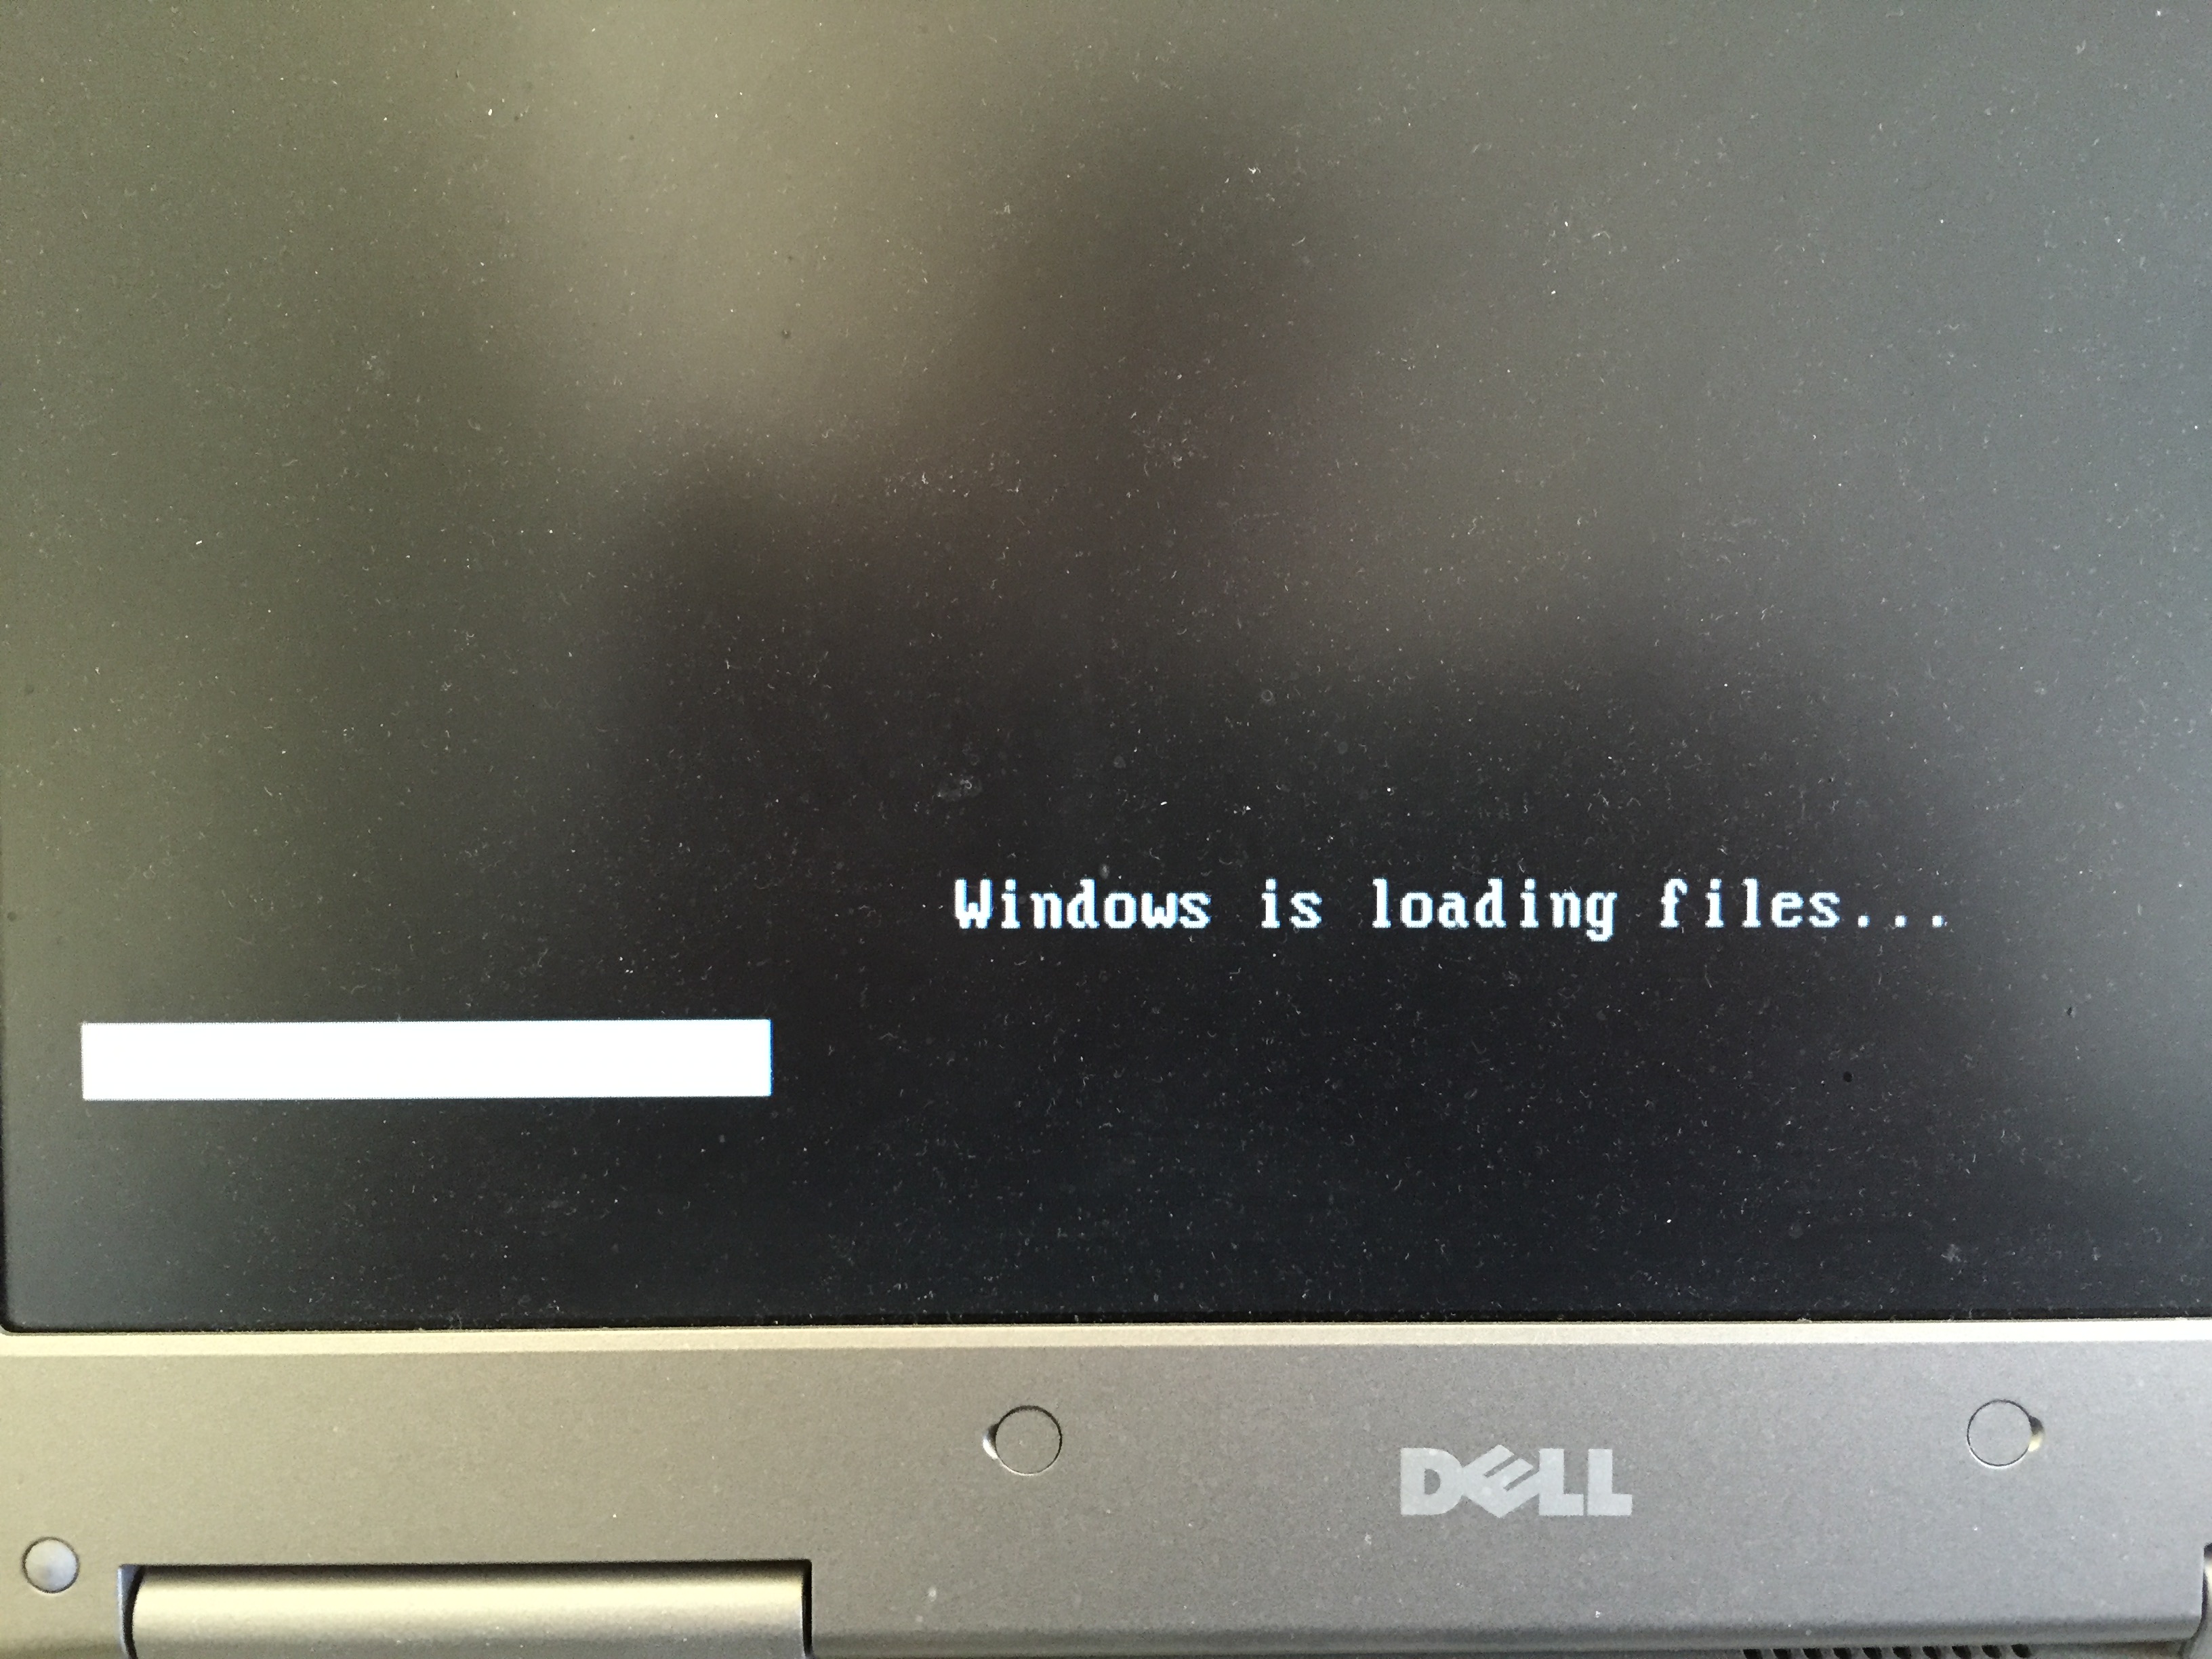
You’ll see the Windows boot loader as shown below.
Endpoint backup takes over and you get the menu shown below.
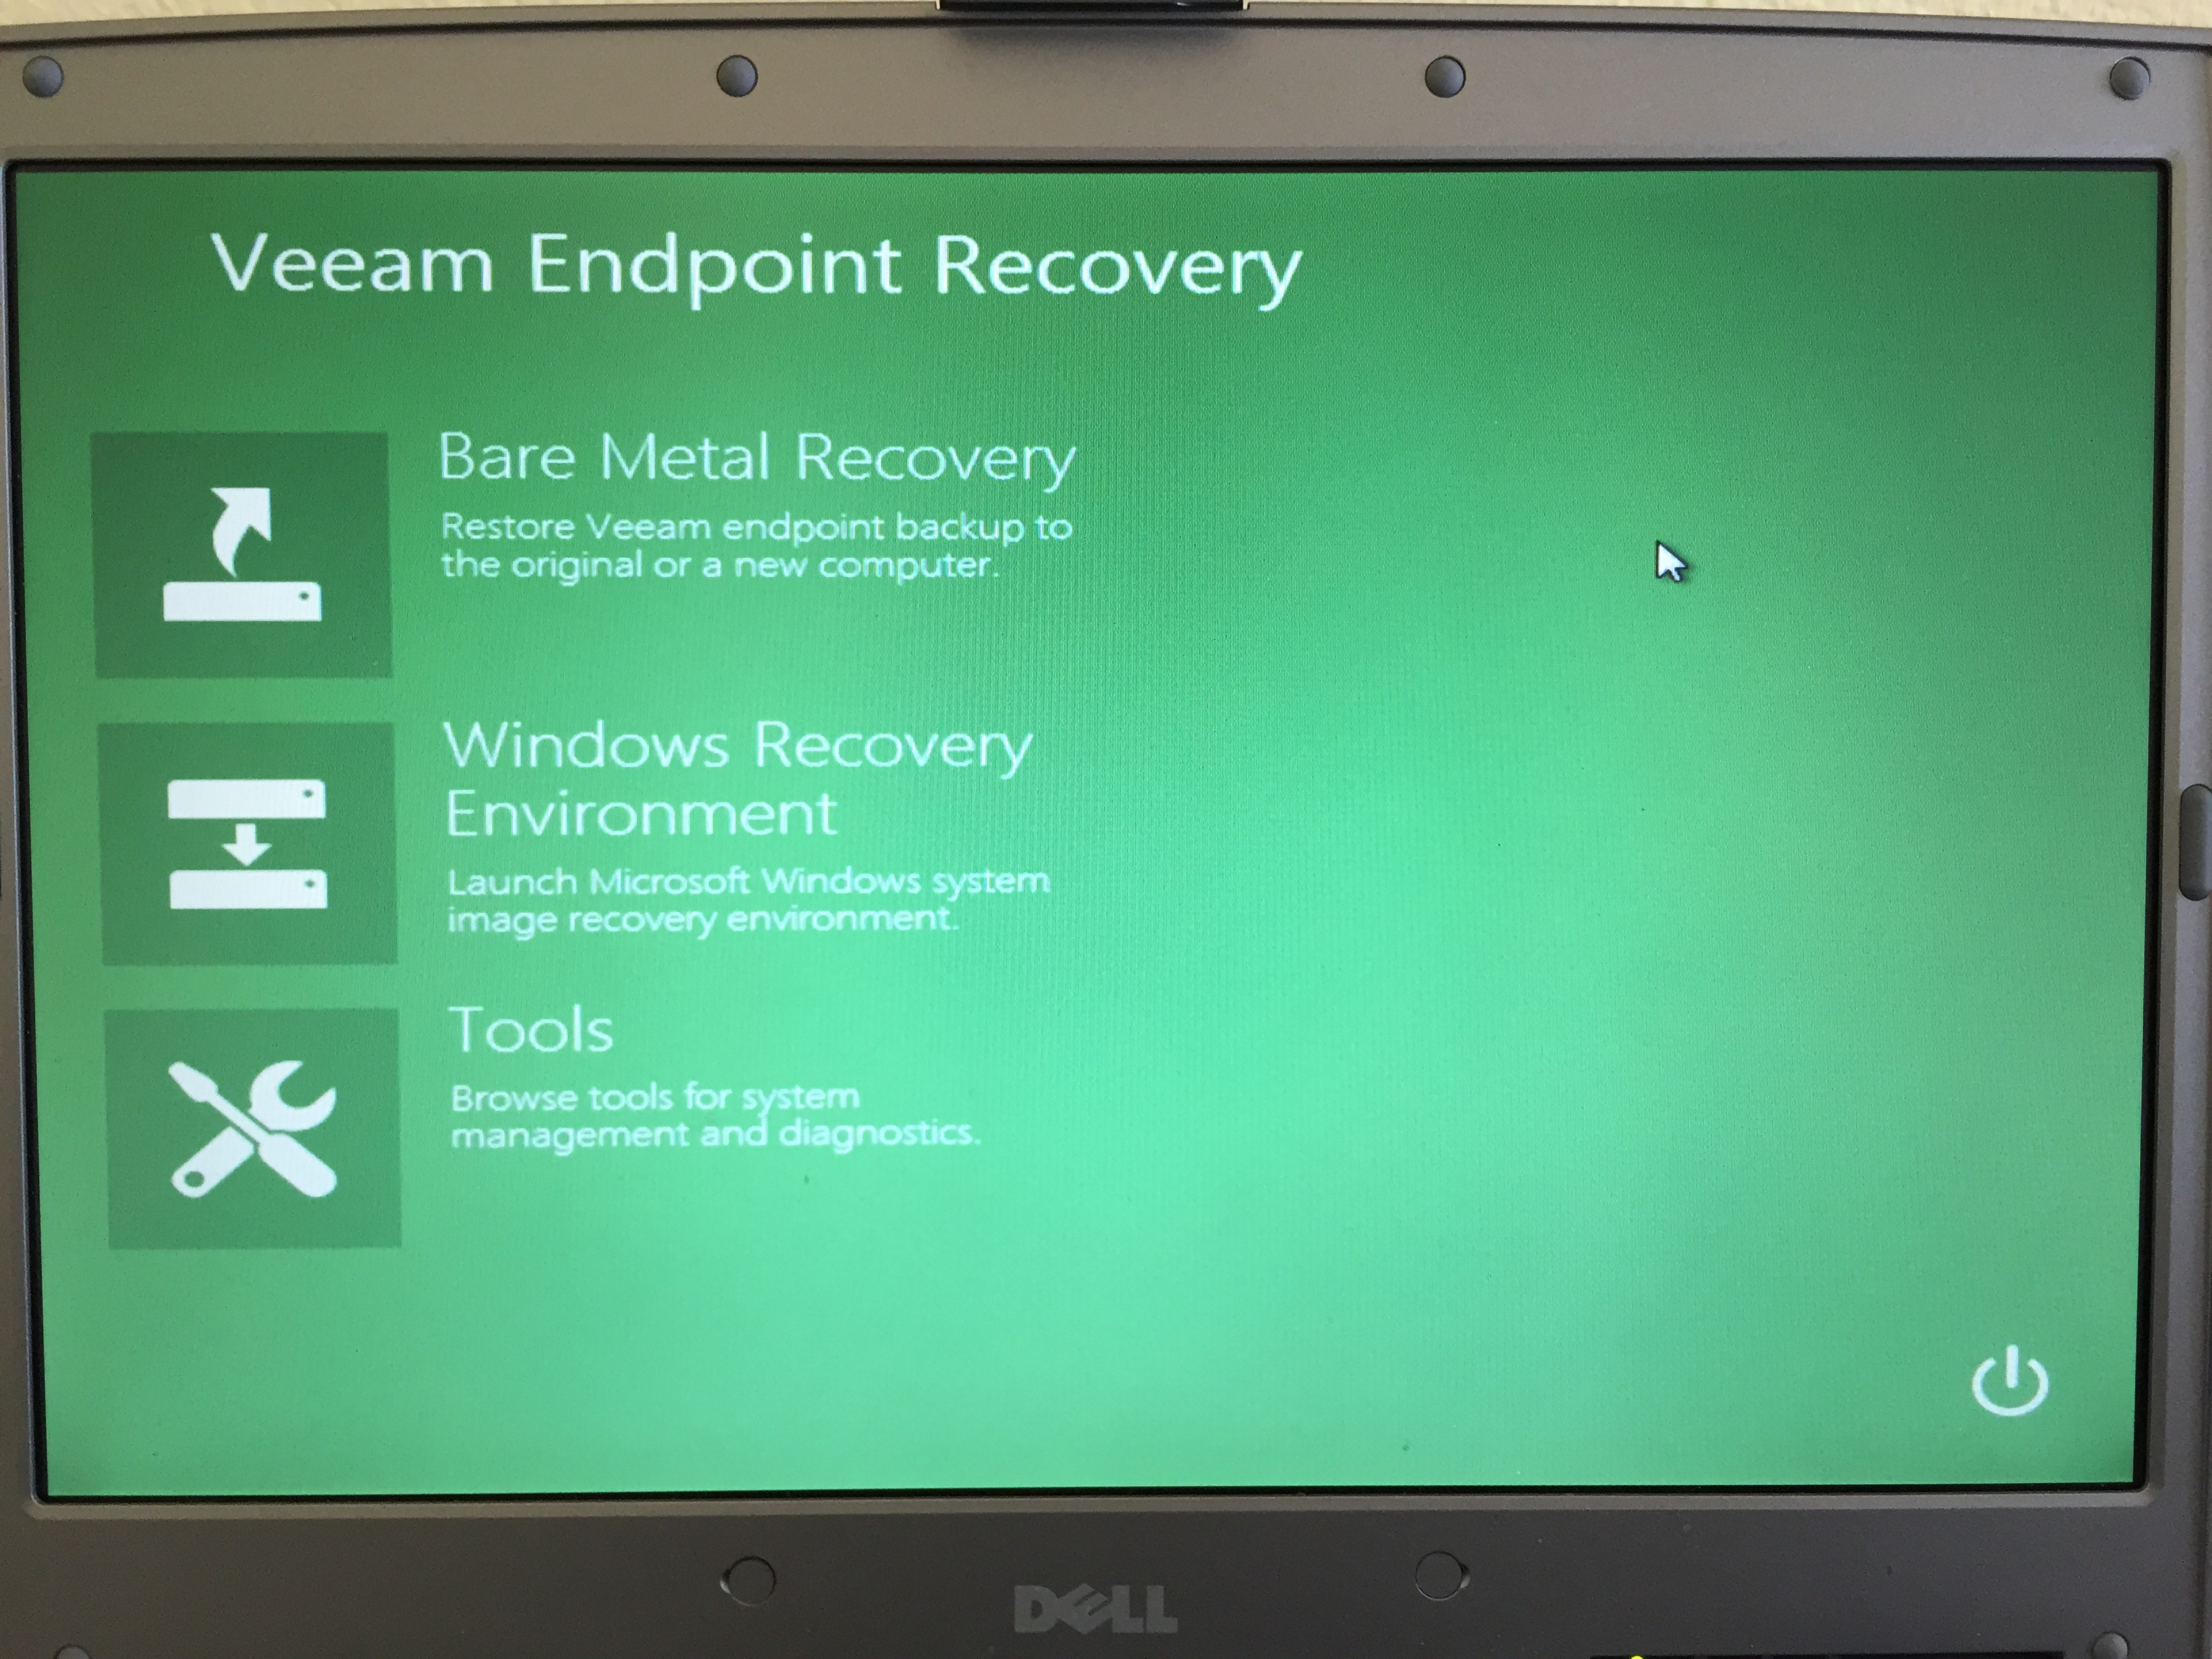
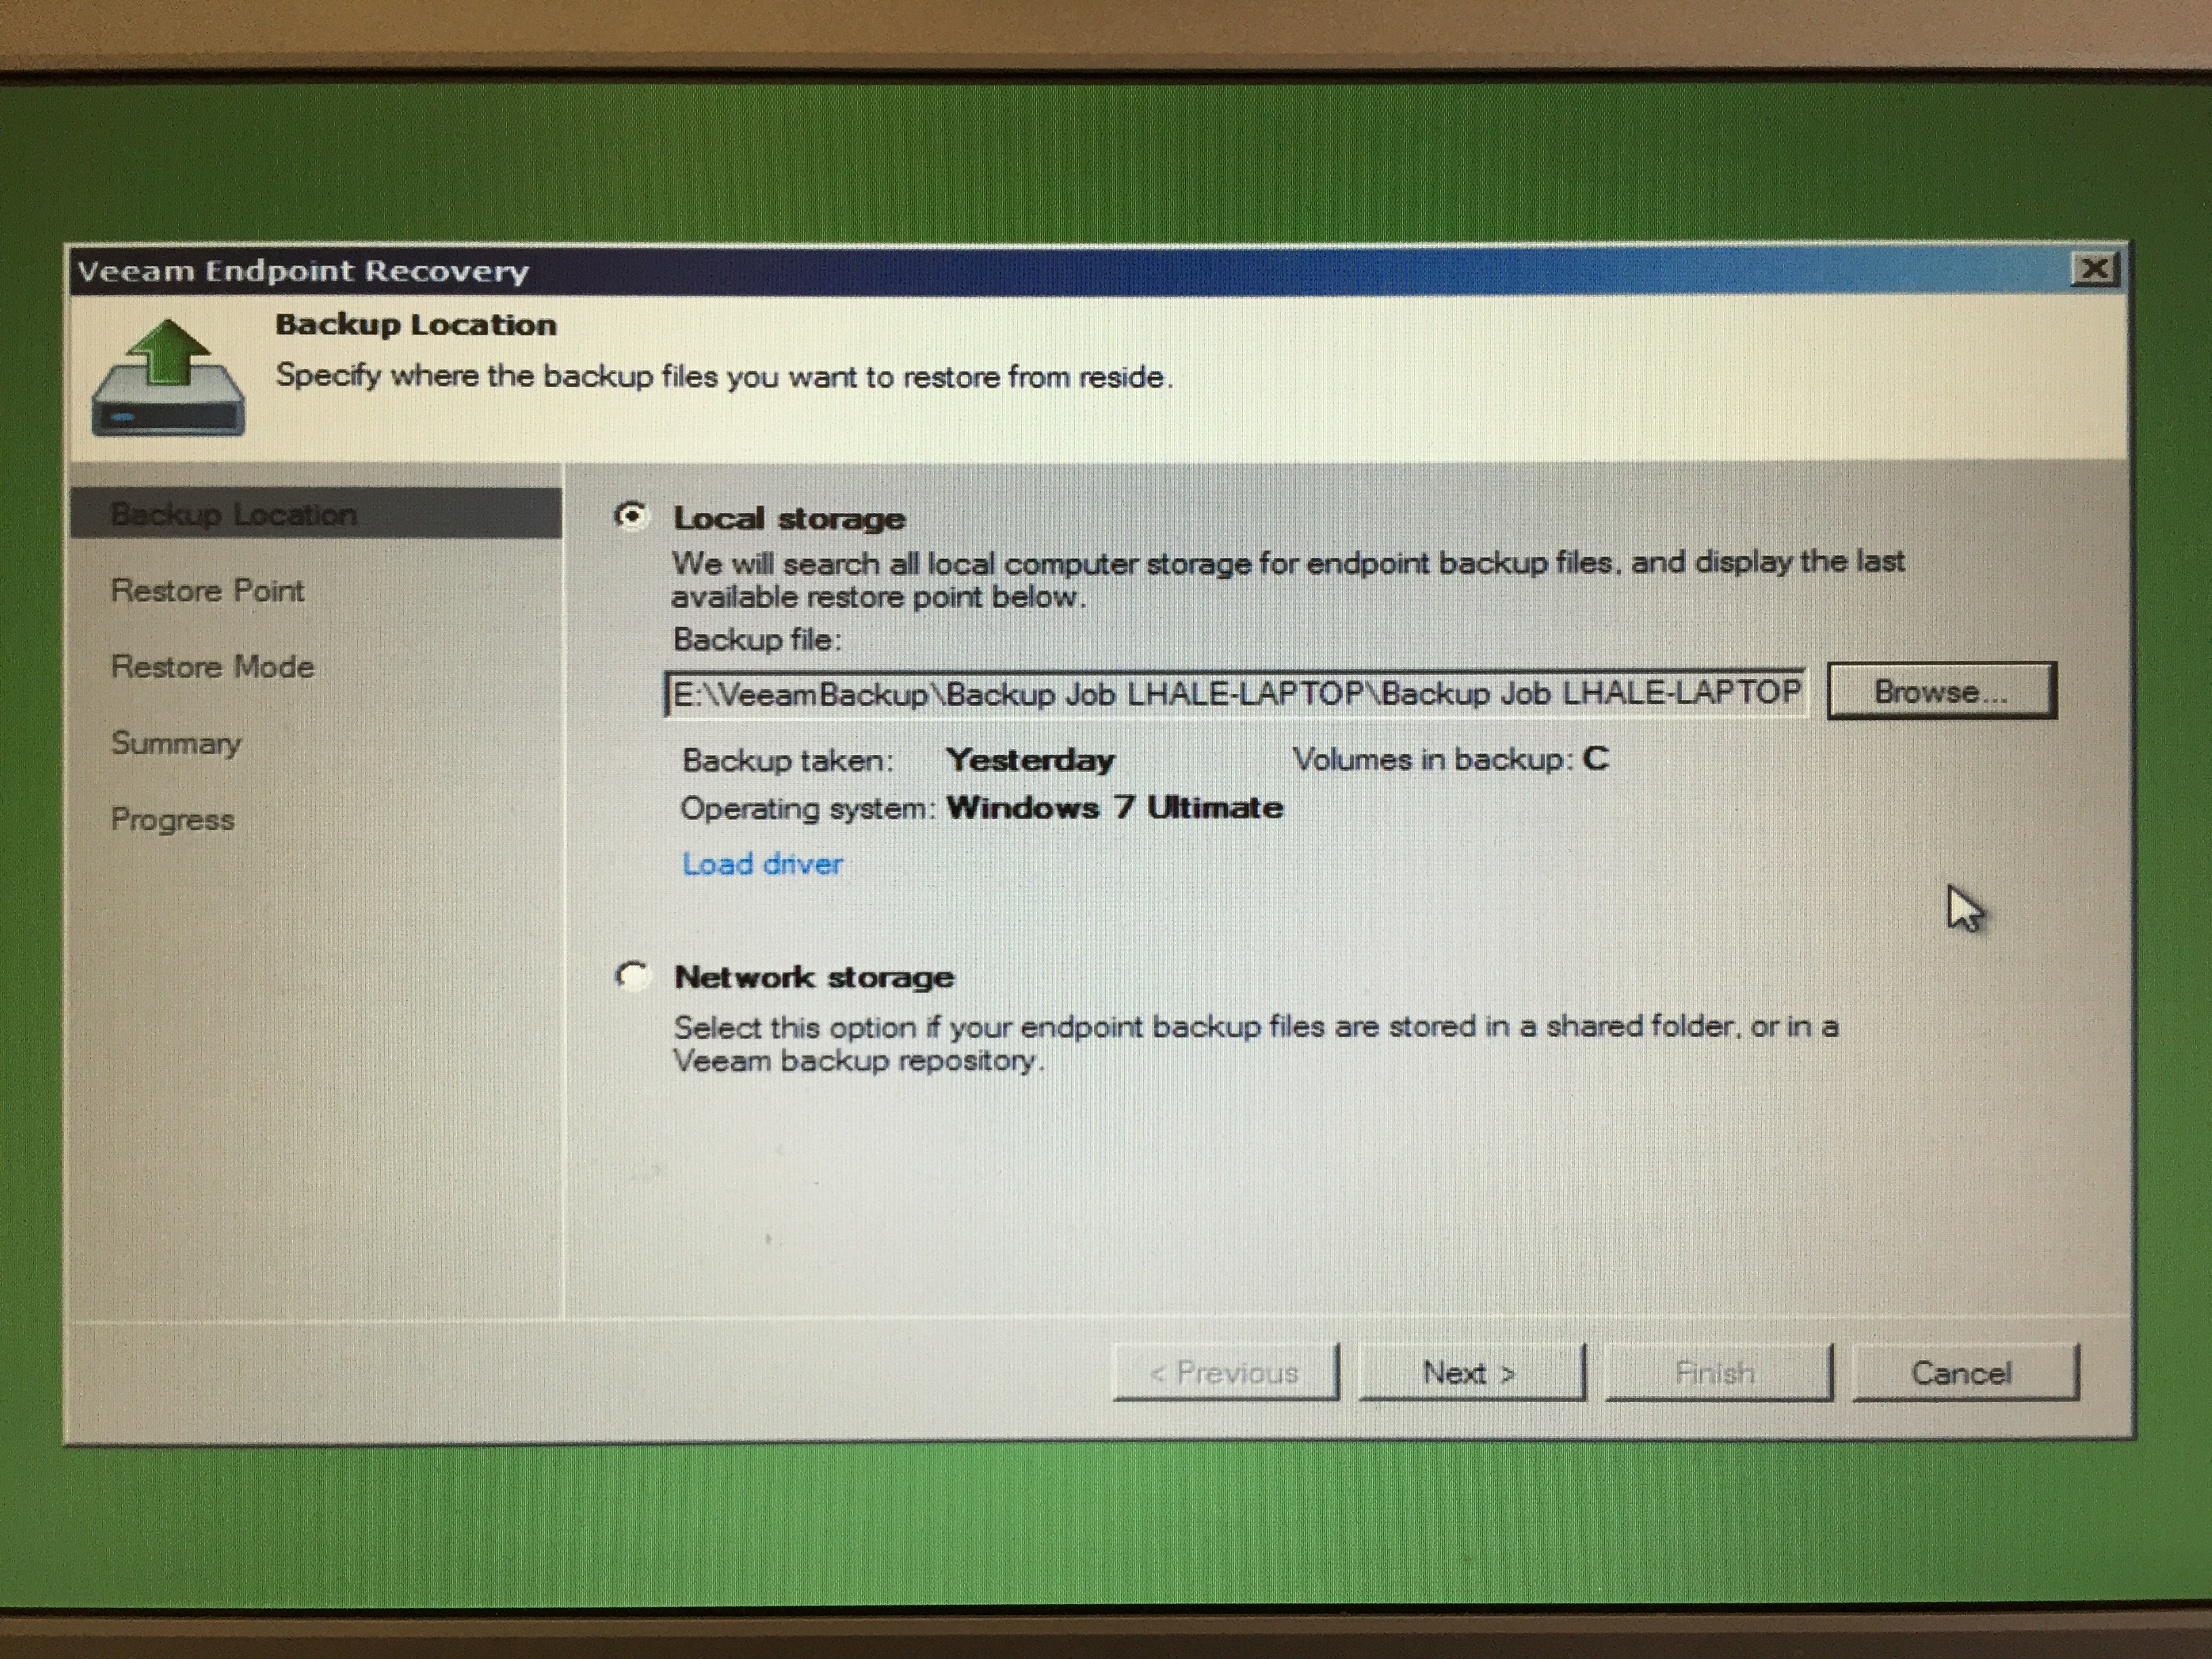
Click on Bare Metal Recovery to launch the wizard. Select the backup source.
Next, select the recovery point. Endpoint Backup uses Forward Incremental method.

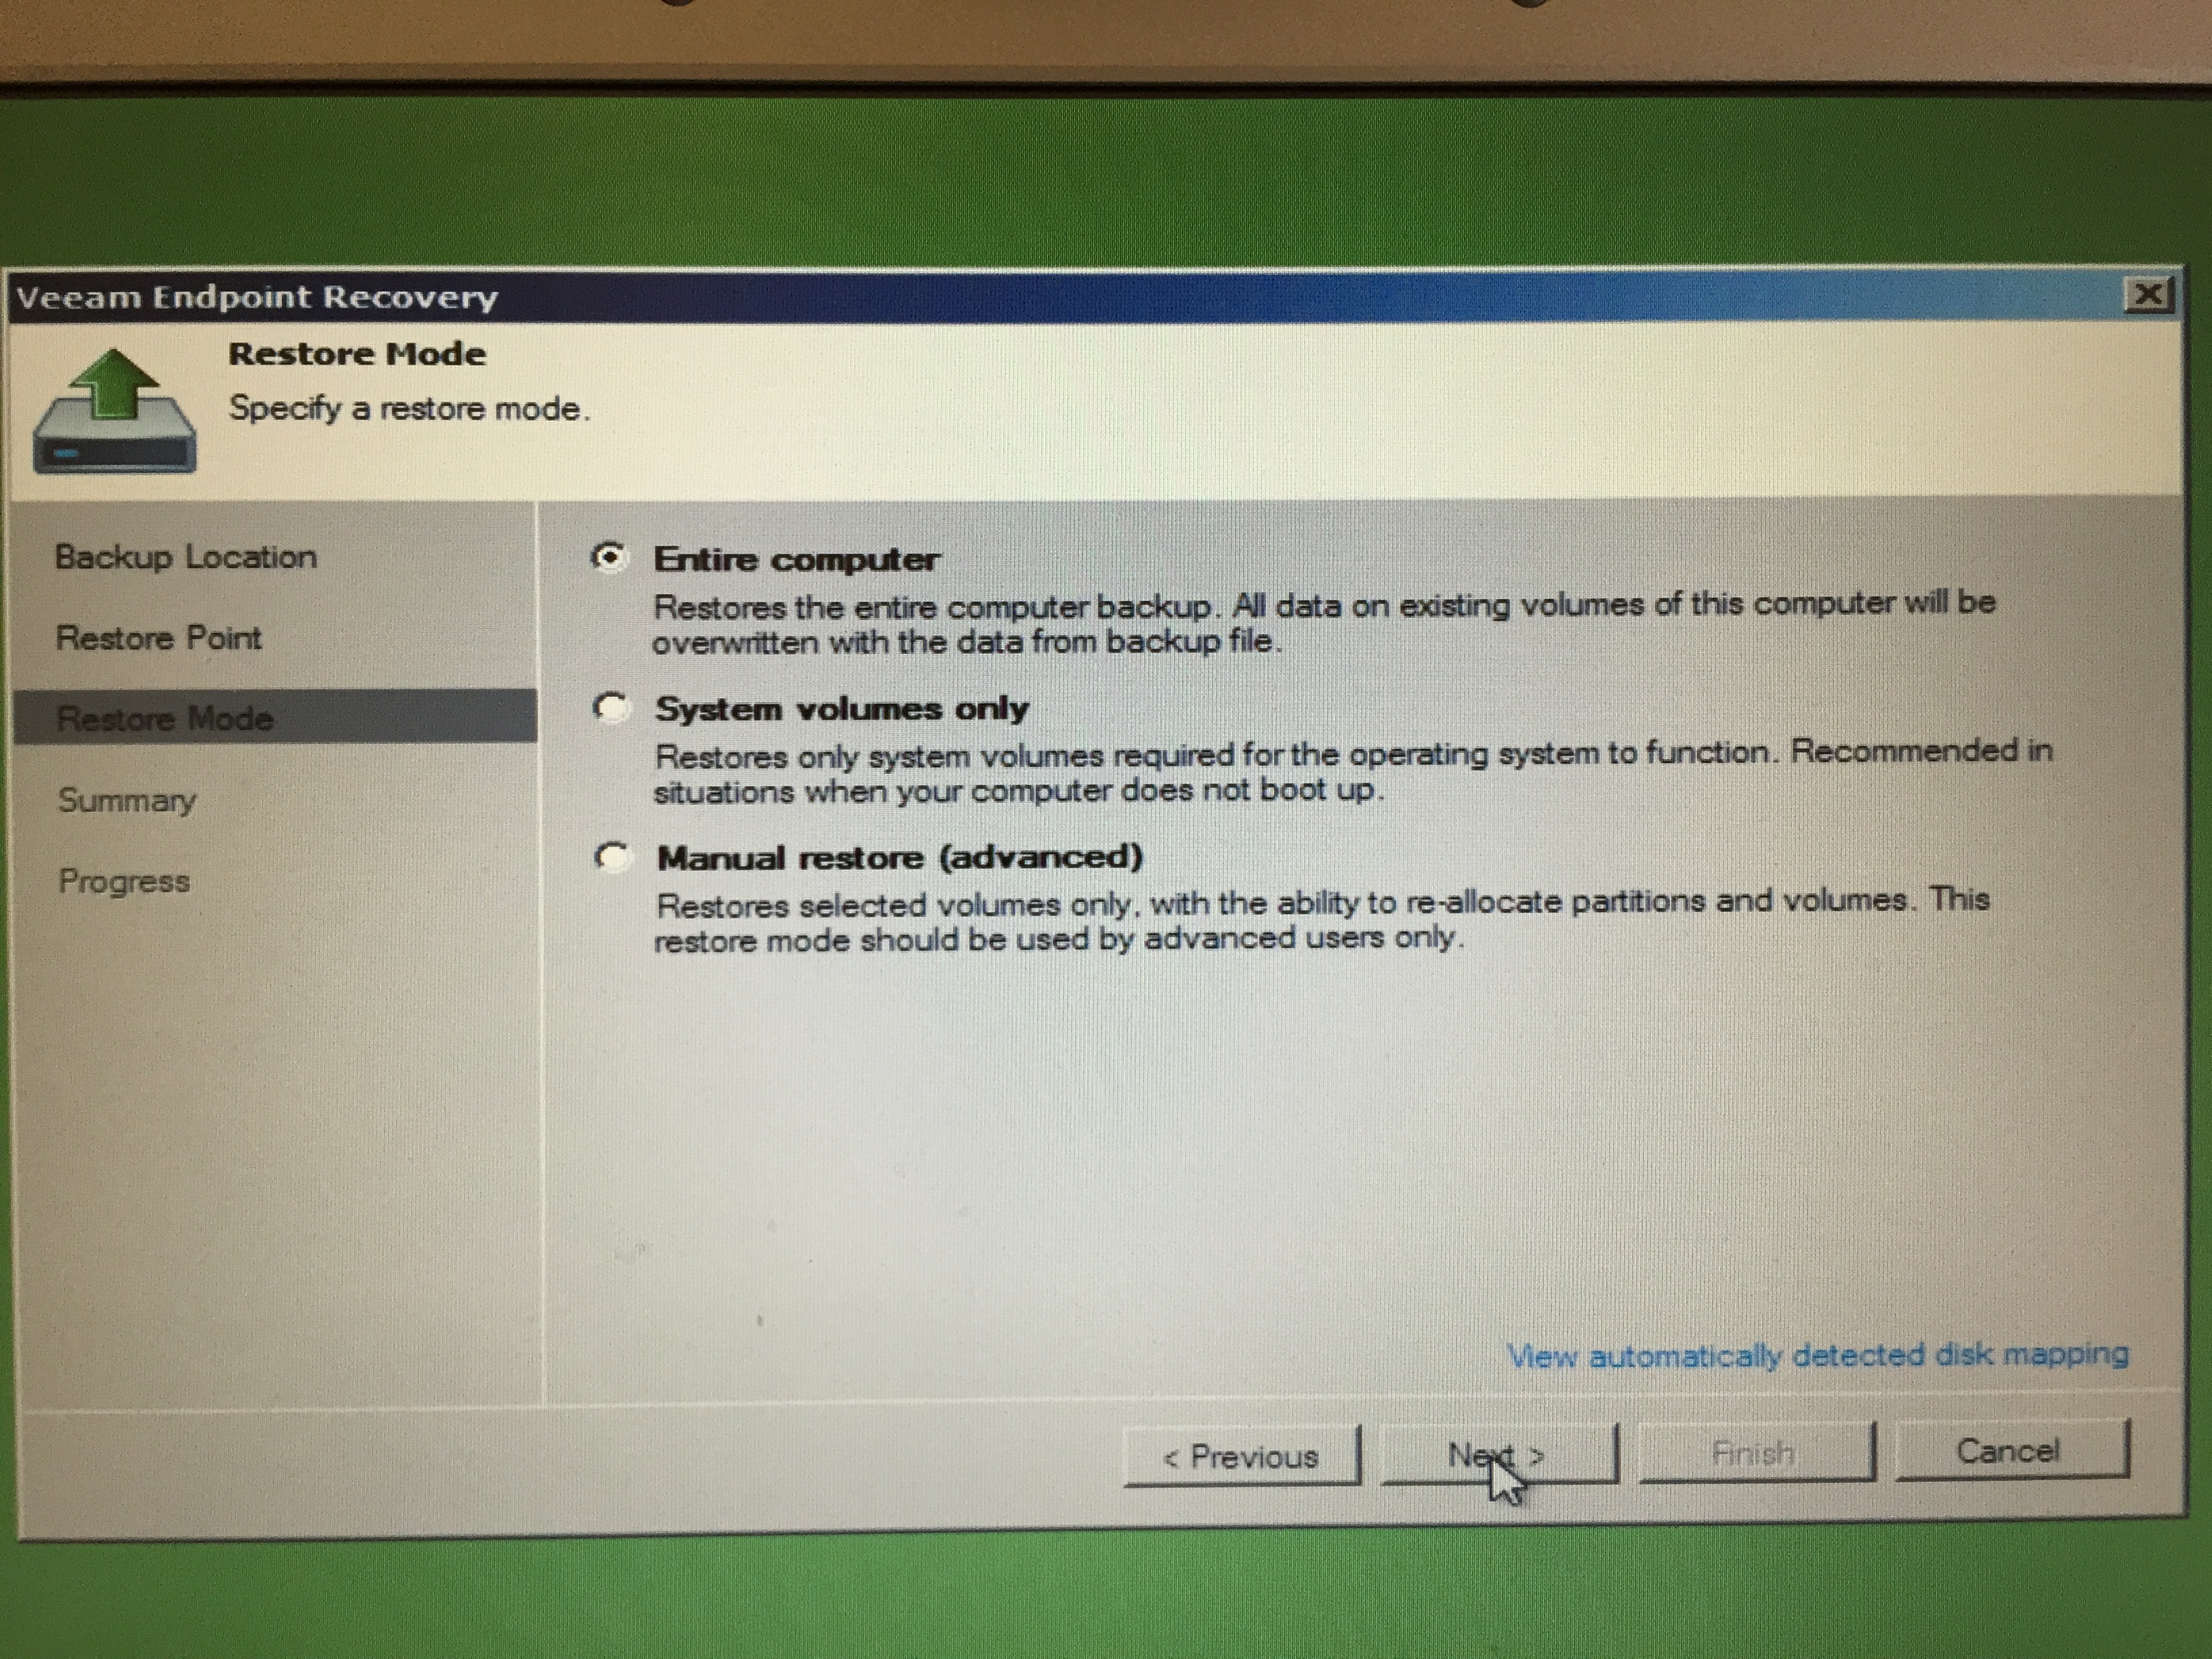
Finally, select the Restore Mode as shown below.
In my case, it took over an hour to restore the computer as shown from the summary screenshot below.

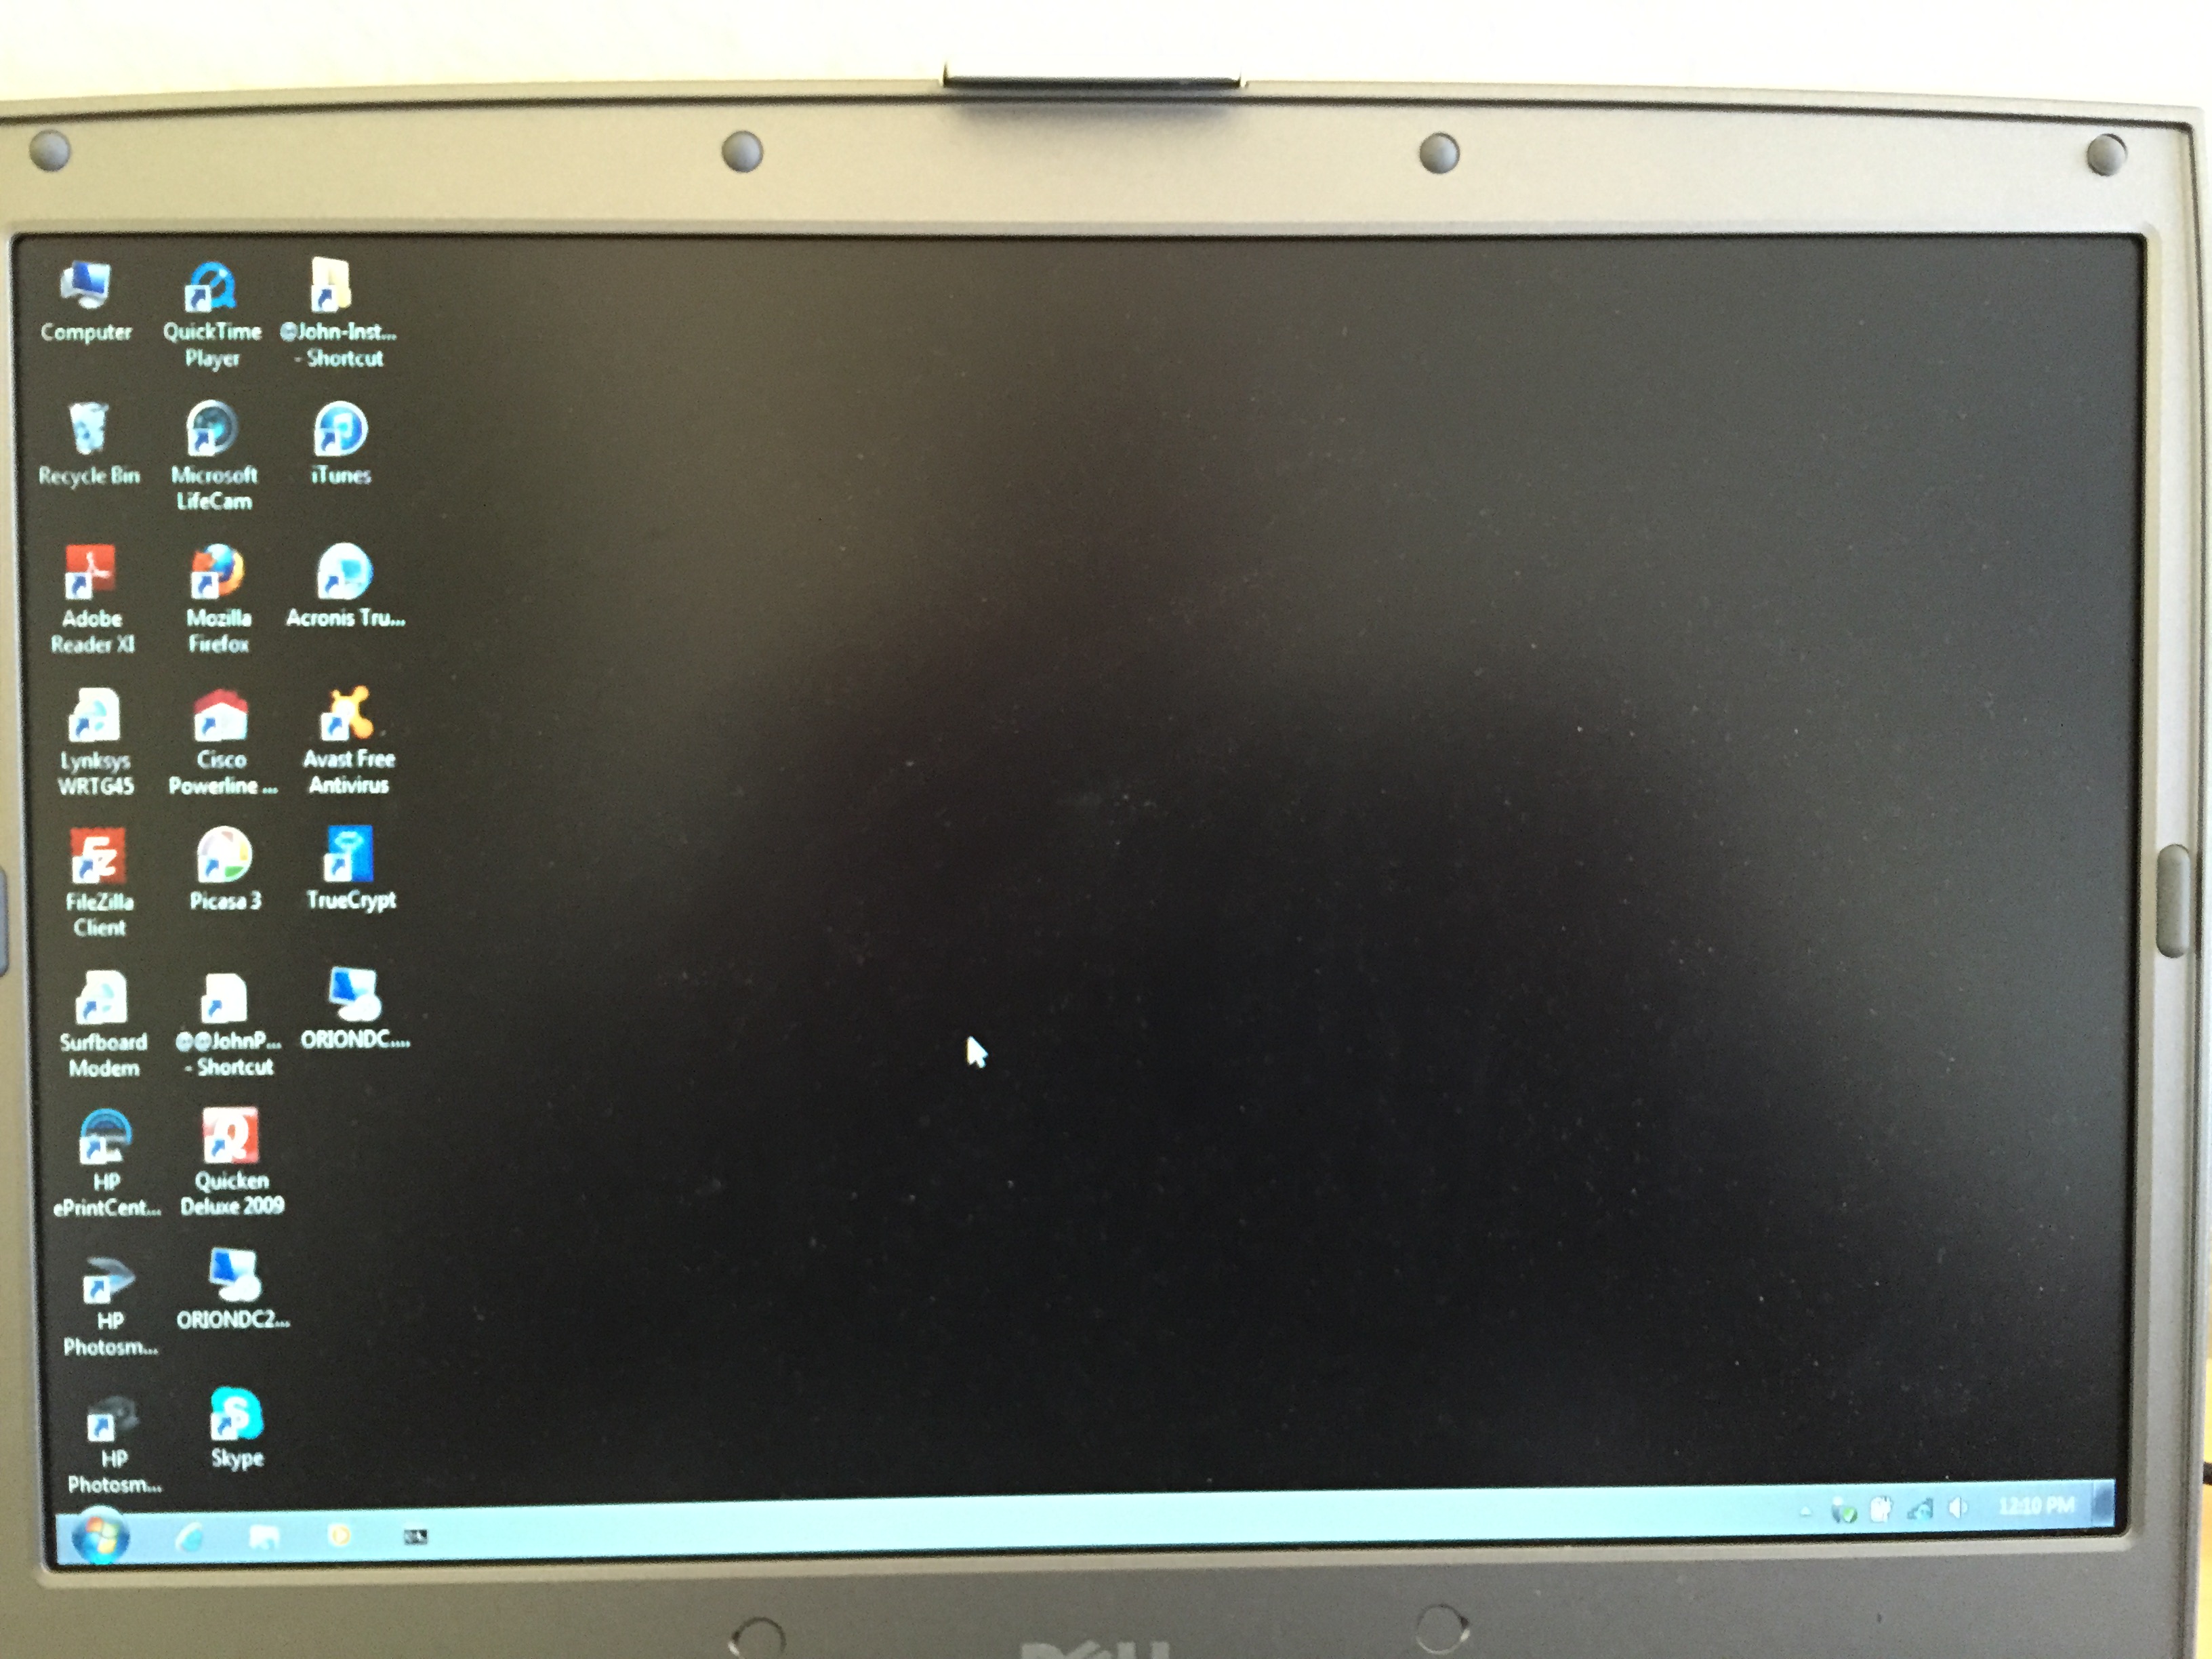
Let’s reboot the computer and see what happens. Windows starts in Error Recovery mode, which is normal.

Finally, the OS comes up, fully functional.
In conclusion, based on my experience, I would recommend this product if you want to add backups of physical servers to your Veeam B&R infrastructure. in a future installment, I’ll try this in a lab where I have enabled a Veeam infrastructure and observer the operation of the veeam B&R console.
This posting is provided “as is” with no warranties, guarantees or rights whatsoever.