
This blog post shows how to use Microsoft System Center Data Protection Manager (DPM) to backup databases on a Windows 2008 R2 server running SQL Server2008R2. System Center DPM has the ability to backup and restore data files on direct attached storage, file shares and Microsoft applications like Exchange, Share Point and SQL Server. I’ve covered tape backup of data files on drives in previous posts. This one illustrates a disk to disk (D2D) short term backup of the AdventureWorksLT database and its subsequent recovery to the original SQL server and to another server running SQL Server.
Overview
In this scenario, I have a Active Directory Domain, OPUS, with a Domain Controller, System Center DPM server, Application Server running SQL Server 2008R@ with Adventure Works installed on it and another server that will be the alternate recovery location that is also running SQL Server 2008 R2
Prerequisites
There is one requirement and a kind of “gotcha” that I’ll cover now rather than burying it in the pictures. The first is that you must have the DPM agent installed and functional on any host computer that you want to include in a Protection Group (backup) and to which you want to run a Recovery job.
The “gotcha” is that if you want to recover a database to an alternate SQL server, you not only have to have included the server in a Protection Group but you must also have run the backup job. If you don’t backup up something on the target, then it won’t appear in a browse list when selecting an alternate SQL server/instance.
The “sub-gotcha” to this one is that, when recovering a database to an alternate server/instance, the database can’t already exist on the server. DPM will automatically create the SQL entries and allow alternate drive mappings for the database and transaction log files.
When recovering a database, we’ll see that the information provided to the wizard is similar to the information that you enter in the database restore wizard in SQL Server Management Studio.
Backup
This operation assumes we have the DPM Agent installed on the two SQL servers. I’m going to set up a Protection Group to backup AdventureWorksLT using short-term protection to disk with synchronization points taken every 15 minutes (the shortest interval available) and recovery points taken 4 times a day or any interval for that matter and a 5 day retention period. Let’s get started.
Navigate to the Protection Groups in the View panel. Click on the New button on the ribbon.

The Wizard begins…
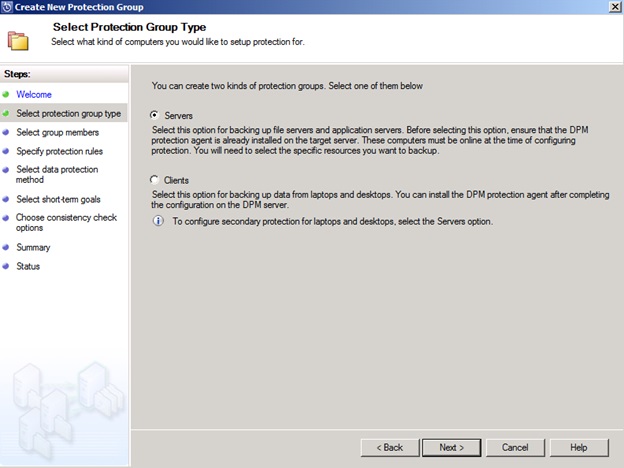
Select the Servers radio button. Click Next.

In the Available members pane, select the server with the DPM agent installed. Expand the tree until you arrive at the databases shown under the SQL server / Instance name. Select the database. The wizard creates an entry in the right-hand pane. Click Next.
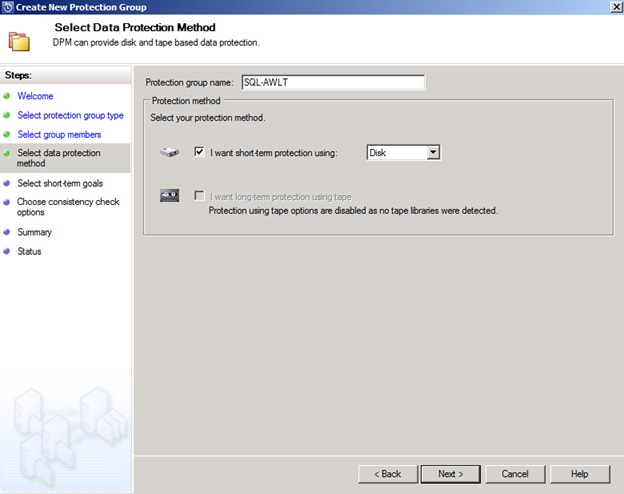
Fill in the Protection group name with an appropriate entry. I’ll choose the Short-term using Disk as shown in the screenshot. You can choose to only use long-term protection or you can choose both Click Next.
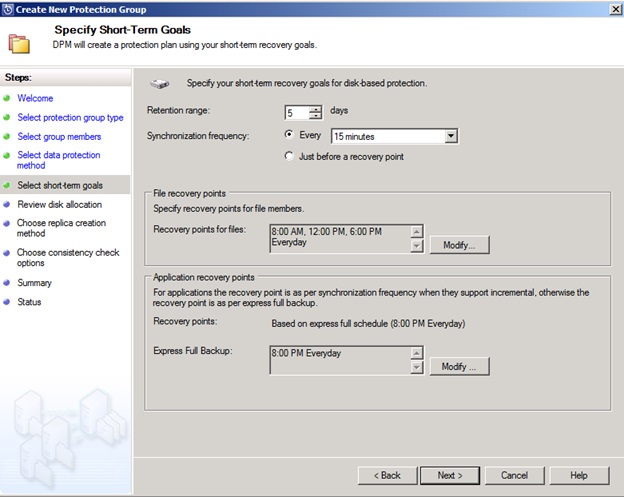
I’ll create 5 retention points and synchronize using the shortest duration, 15 minutes. This is considered almost continuous protection since the replica is synchronized with incremental disk changes on files in the database. The recovery point is based on the daily Express Full Backup which keeps the replica in synch with the current database while moving down the previous retention point to an archive state.
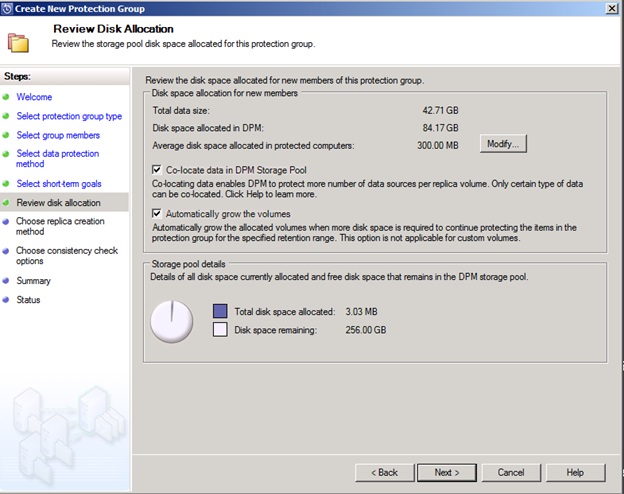
I generally let DPM do the math for me in carving out space in the disk pool. Since this is disk-based, the full replica as well as the incremental storage become part of the space allocated in the disk pool for this member of the protection group. You can adjust it when the need arises. I’ve only adjusted the space a member needs in a protection group, when DPM underestimated the amount of space required for a member server’s System Protection component.
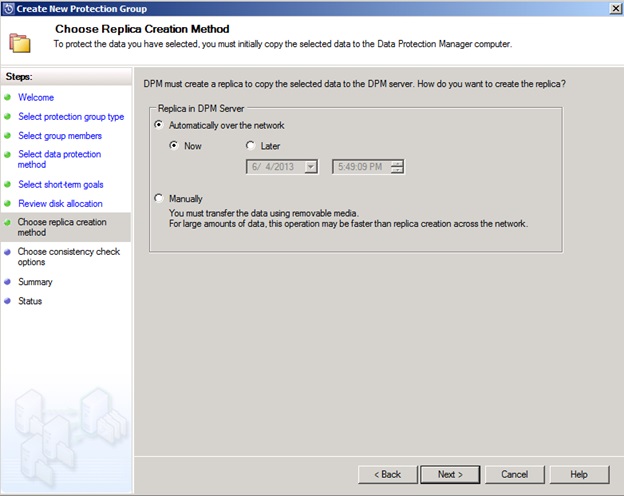
The first step executed in any protection group is the creation of the replica. The replica is basically a full backup. Replicas are kept up to date as the protection group jobs are run according to schedule. Each cycle creates an archive that is kept for the number of retention periods specified. I generally run the replica at the time of the group creation. Press Next to continue.
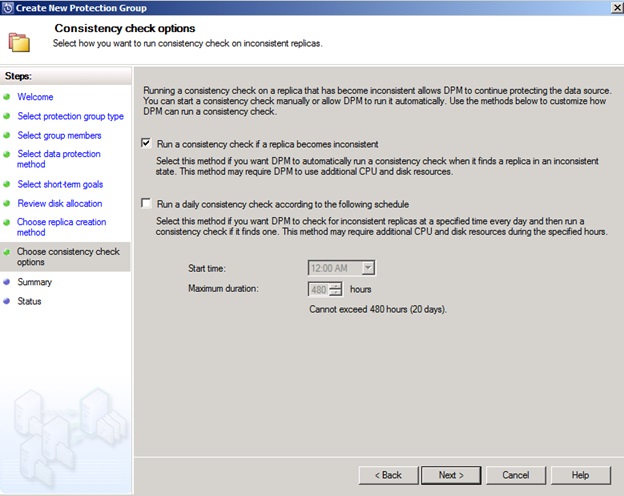
I generally leave the default selection checked to let DPM bring the replica in line when it detects an inconsistency. Click Next.
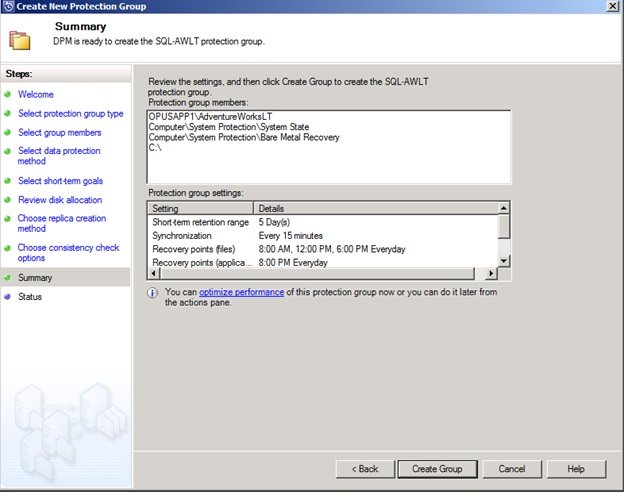
Review the settings and click Create Group.

Review job status and click Close.
Back in Protection view, you can sees the status of the first-time replication steps being executed as shown below.

Recovery
This side of the post will take us to a database recovery. First, I create a database change using SSMS. Next, I schedule a backup (recovery point) and finally, a restore operation.
The Adventure Works database is in Full Recovery mode. I use SSMS to edit the Customer table.
![]()
Change customer #1 from Orlando

to John.
I’ll schedule a recovery point using Express Full Backup. Right-click the Protection Group and choose Create Recovery Point.

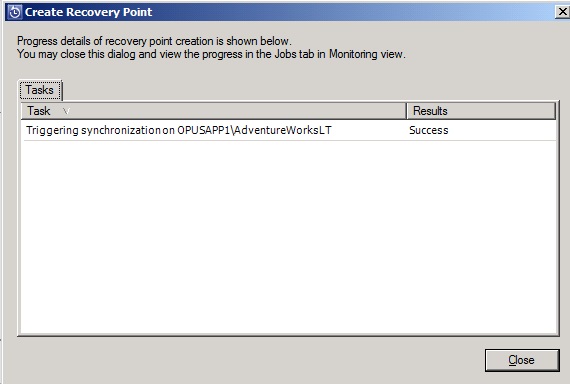
The backup is successful, Click Close.
Chose Recovery from the View window.
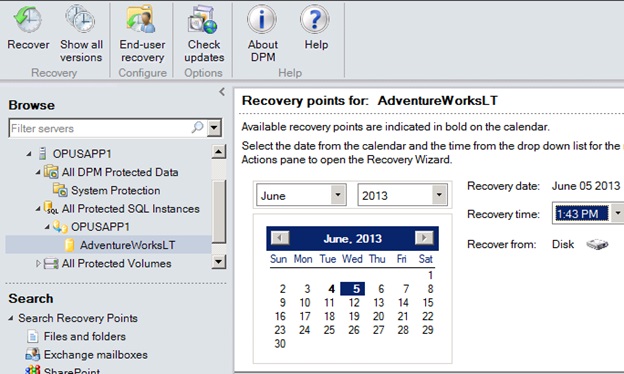
Navigate to the database and select a date/time. The recovery point dates that are available are shown in bold. Click the Recover button in the ribbon to launch the Recovery Wizard. Click Next.

I’m going to recover to the original source. Other options are to a different instance of SQL on a different server and/or Instance. Click Next.
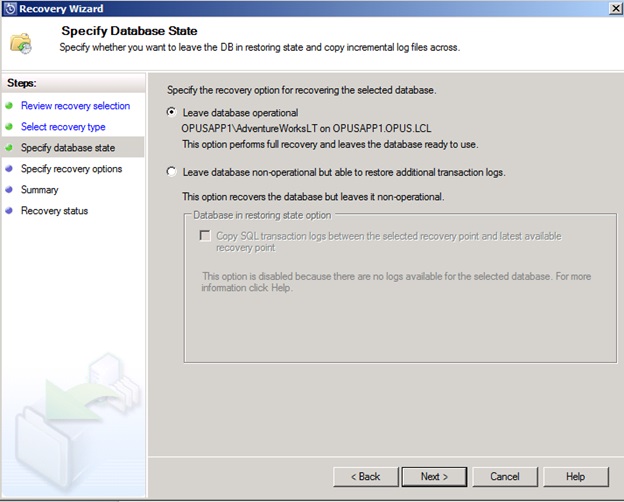
I’m going to make this a complete recovery. At this point it will look like the SSMS recovery wizard giving you the option of keeping the database in recovery state while you replay transaction logs. Click Next.
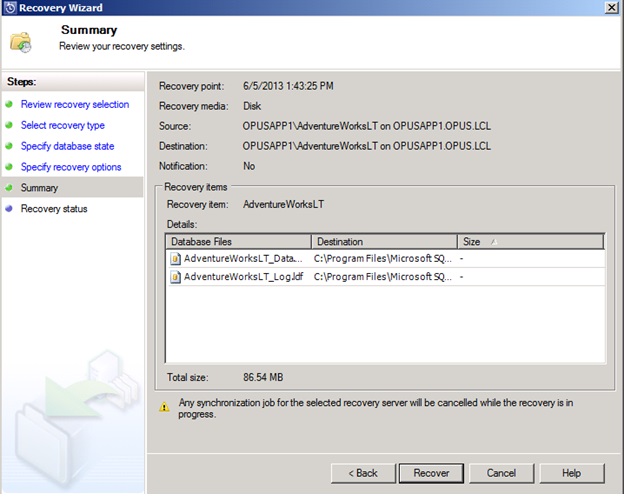
Since this a a replacement recovery, the details are known to DPM. Click Recover. You can view progress in the status window. When complete click Close.

Use SQL Server Management Studio to display the first 1000 records. See that Customer #1 is back to the original entry, “Orlando.”
Restore the backup to another SQL server.
We’ve rolled back the database to an earlier time when the first backup was created on the original server. Now, I’m going to restore the backup to a different SQL server. When specifying another server, keep in mind that DPM will create the database for you. You can’t recover a database from one server to another instance where the database is already there. You will get an error stating this fact. Oh, you must have the DPM agent installed on this server.
Launch the Recovery Wizard, selecting Recover to any instance of SQL Server. Click Next.
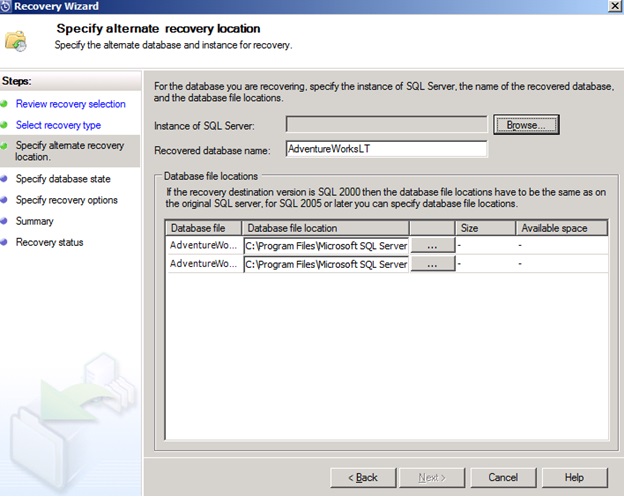
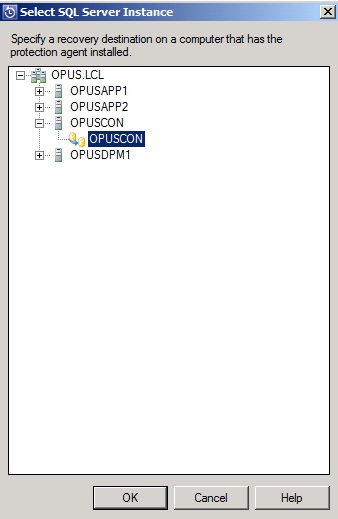
When specifying an alternate, click Browse. Select the appropriate server.
Note the agent must be installed on the target SQL server for it to appear in DPM’s list of servers with agents installed.
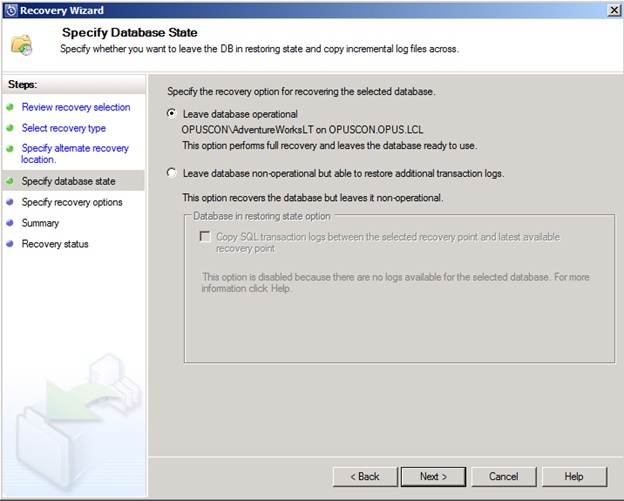
Select Leave the database operational. Click Next.
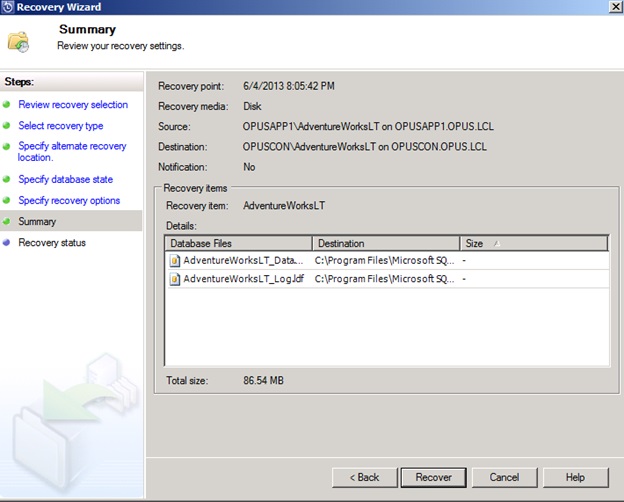
Check the Summary and click Recover to begin.
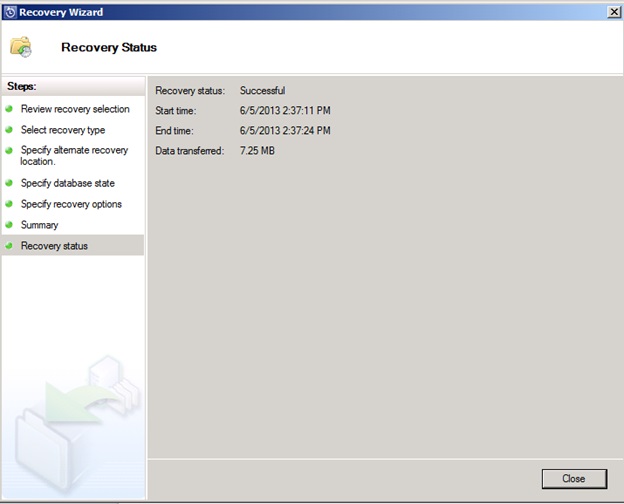
When the operation completes, click Close.

Verify by running SSMS and viewing the Customer Table on the alternate SQL server.
There are other variations to the SQL server application backup and restore that you should try out in your own lab preferably with a test engine that will run through logged transactions to test out the functionality associated with point-in-time recovery from a full and incremental backup strategy.
This posting is provided “as is” with no warranties, guarantees or rights whatsoever.
Great article, i’ve wrote a detailed tutorial on the best way to create protection groups that will compliment your article http://www.networkangel.net/how-to-use-systems-center-2012r2-data-protection-manager-dpm